---
title: "Data Science for Economists"
# subtitle: ""
subtitle: "Lecture 13: Docker"
author: "Grant McDermott"
date: "University of Oregon | [EC 607](https://github.com/uo-ec607)" #"`r format(Sys.time(), '%d %B %Y')`"
output:
xaringan::moon_reader:
css: [default, metropolis, metropolis-fonts]
lib_dir: libs
nature:
# ratio: "16:9"
highlightStyle: github
highlightLines: true
highlightSpans: true
countIncrementalSlides: false
---
name: toc
```{css, echo=FALSE}
@media print {
.has-continuation {
display: block !important;
}
}
.large4 { font-size: 400% }
.large2 { font-size: 200% }
.small90 { font-size: 90% }
.small75 { font-size: 75% }
```
```{r setup, include=FALSE}
options(htmltools.dir.version = FALSE)
library(knitr)
opts_chunk$set(
eval = FALSE, ## Turn off eval for this deck!
prompt = TRUE, ## See hook below. I basically want a "$" prompt for every bash command in this lecture.
fig.align="center", #fig.width=6, fig.height=4.5,
# out.width="748px", #out.length="520.75px",
dpi=300, #fig.path='Figs/',
cache=F#, echo=F, warning=F, message=F
)
## Next hook based on this SO answer: https://stackoverflow.com/a/39025054
knit_hooks$set(
prompt = function(before, options, envir) {
options(
prompt = if (options$engine %in% c('sh','bash')) '$ ' else 'R> ',
continue = if (options$engine %in% c('sh','bash')) '$ ' else '+ '
)
})
```
# Table of contents
1. [Prologue](#prologue)
2. [Docker 101](#intro)
3. [Examples](#examples)
- [Base R](#r-base)
- [R-dev](#r-dev)
- [RStudio+](#rstudio+)
4. [Write your own Dockerfiles & images](#own)
5. [Sharing files with a container](#share)
6. [Cleaning up](#clean)
7. [Conclusions](#conclusions)
---
class: inverse, center, middle
name: prologue
# Prologue
---
# Install Docker
- [Linux](https://docs.docker.com/engine/install)
- [Mac](https://docs.docker.com/docker-for-mac/install/)
- Windows (install varies by version)
- [Windows 10 Pro / Education / Enterprise](https://docs.docker.com/docker-for-windows/install/)
- [Windows 10 Home](https://docs.docker.com/docker-for-windows/install-windows-home/)
- [Windows 7 / 8](https://docs.docker.com/toolbox/toolbox_install_windows/)
---
class: inverse, center, middle
name: intro
# Docker 101
---
# Motivation
Have you ever...
--
- tried to install a program or run someone else's code, only to be confronted by a bunch of error messages (missing packages, dependencies, etc.)?
--
- shared your code and data with someone else, only for _them_ to be confronted by a bunch of error messages (missing packages, dependencies, etc.)?
--
- re-run your _own_ code after updating some packages, only to find that it no longer works or the results have changed?
--
Containers are way to solve these and other common software problems.
--
### Docker
By far the most widely used and best supported container technology. While there are other container platforms around, when I talk about "containers" in this lecture, I'm really talking about [**Docker**](https://www.docker.com/).
---
# The "container" analogy
You know those big shipping containers used to transport physical goods?
.pull-left[

]
.pull-right[

]
They provide a standard format for transporting all kinds of goods (TVs, fresh produce, whatever). Moreover, they are stackable and can easily be switched between different transport modes (ship, road, rail).
--
Docker containers are the software equivalent.
- physical goods <-> software
- transport modes <-> operating systems
---
# In even simpler terms...
A docker container is just the software equivalent of a box.†
.footnote[† This description (the whole slide, really) is shamelessly stolen from [Dirk Eddelbuettel](https://dirk.eddelbuettel.com/papers/cologneRUG2020.pdf).]
.pull-left[

]
.pull-right[
✓ Standardized shape and form.
✓ Everyone can use.
✓ "If it runs on your machine, it will run on my machine."
]
--
More importantly, it allows us to always run code from a pristine, predictable state.
---
# Why do we care?
### 1. Reproducibility
If we can bundle our code and software in a Docker container, then we don't have to worry about it not working on someone else's system (and vice versa). Similarly, we don't have to worry about it not working on our own systems in the future (e.g. after package or program updates).
- Examples of academic research projects using Docker for reproducibility [here](https://github.com/grantmcdermott/sceptic-priors) and [here](https://github.com/johnjosephhorton/wages_of_paycuts).
### 2. Deployment
There are many deployment scenarios (packaging, testing, etc.). Of particular interest to this course are data science pipelines where you want to deploy software quickly and reliably. Need to run some time-consuming code up on the cloud? Save time and installation headaches by running it through a suitable container, which can easily be deployed to a cluster of machines too.
---
# How it works
1. Start off with a stripped-down version of an operating system. Usually a Linux distro like Ubuntu.
2. Install _all_ of the programs and dependencies that are needed to run your code.
3. (Add any extra configurations you want.)
4. Package everything up as a [tarball](https://en.wikipedia.org/wiki/Tar_%28computing%29).†
.footnote[
† A format for storing a bunch of files as a single object. Can also be compressed to save space.
]
--
**Summary:** Containers are like mini, portable operating systems that contain everything needed to run some piece of software (but nothing more!).
---
# The big idea
```{r b0rk_zine, eval = TRUE, echo=FALSE, out.width="90%"}
knitr::include_graphics("pics/b0rk_zine.jpg")
```
.pull-right[*Credit: [Julia Evans](https://twitter.com/b0rk/status/1237464479811633154). (Buy the [zine](https://wizardzines.com/zines/containers/)!)*]
---
# Quick terminology clarification
**Dockerfile** ~ "The sheet music." The list of layers and instructions for building a Docker image.
**Image** ~ "The MP3 file." This is the tarball that we talked about on the previous two slides.
**Container** ~ "Song playing on my phone." A container is a running instance of an image.
--
name: imagevscontainer
Think of the Dockerfile as a piece of sheet music, which tells us everything we need to play a song (key, instruments, chords, tempo, etc.) The image is a recording of the music that perfectly reflects the sheet music (e.g. an MP3 file). A container is a playing instance of that file (maybe on my phone, maybe through my home speakers, etc.)
---
class: inverse, center, middle
name: examples
# Examples
---
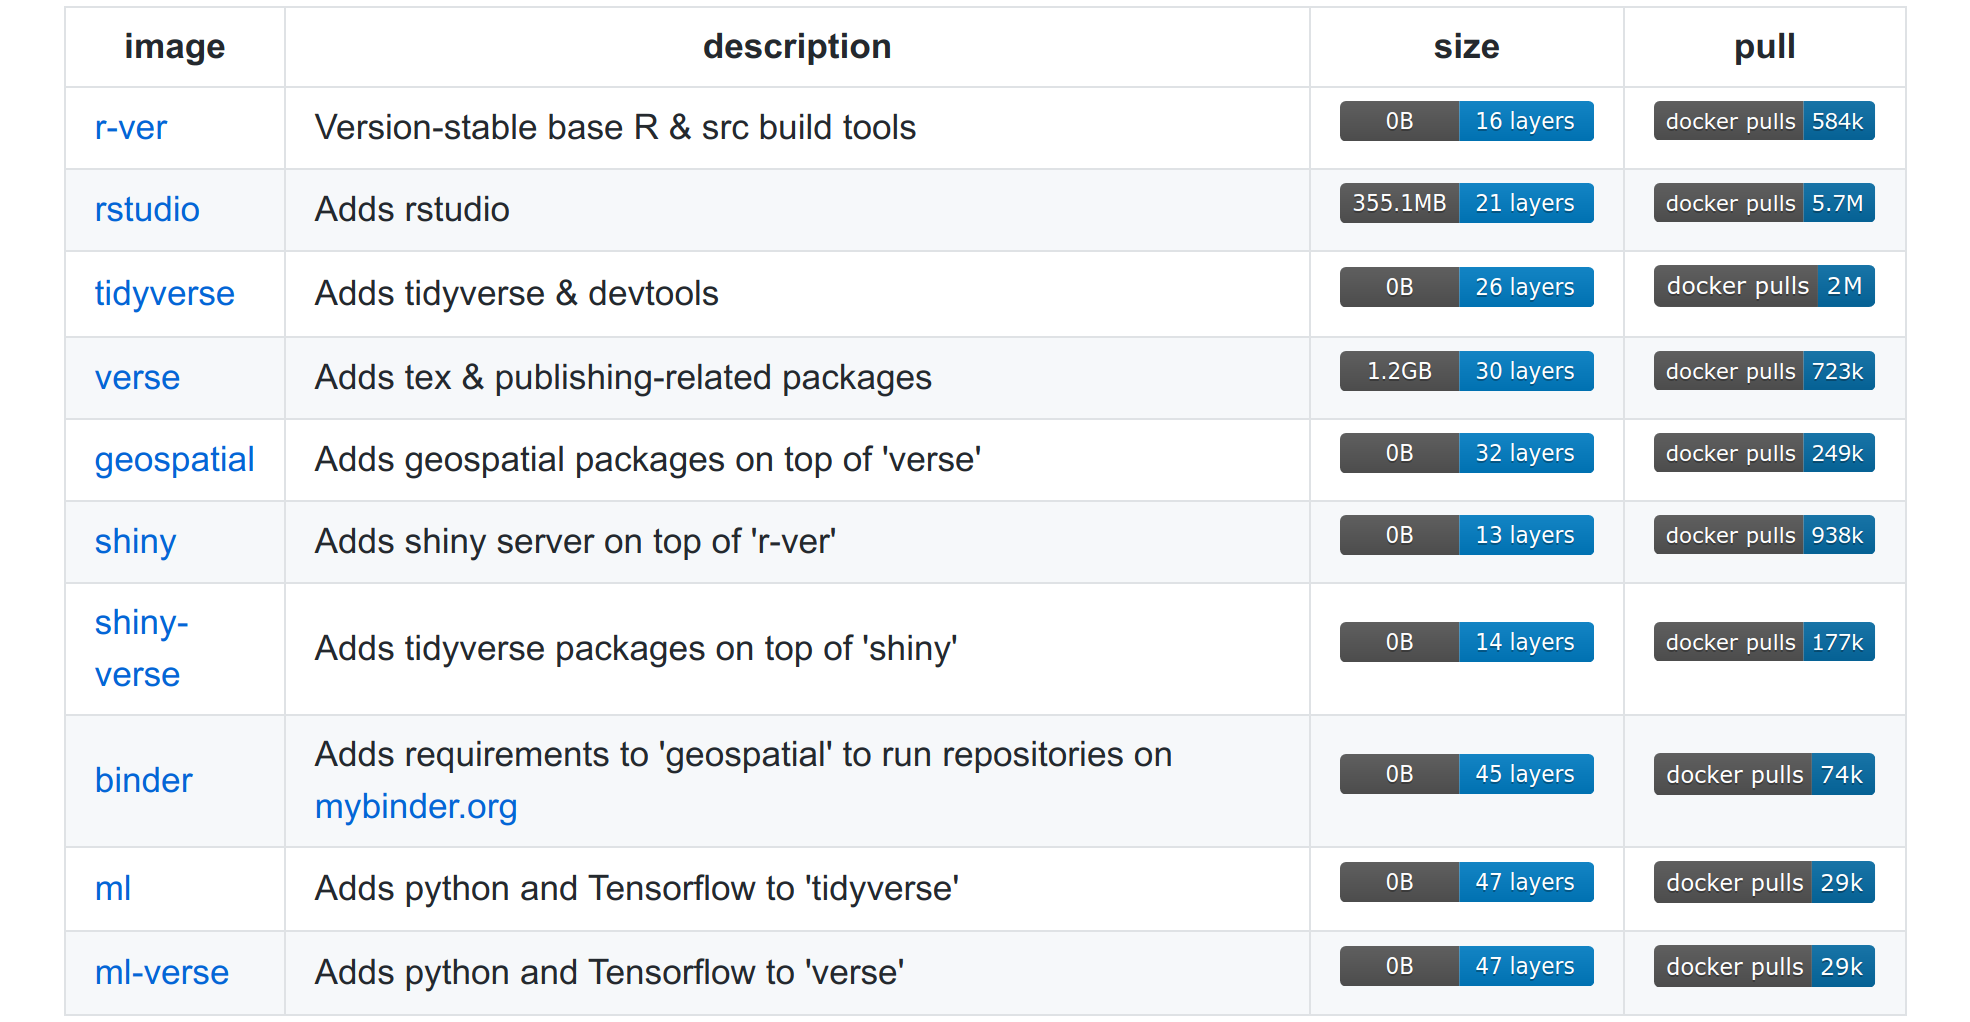
# Rocker = R + Docker
It should now be clear that Docker is targeted at (and used by) a bewildering array of software applications.
In the realm of economics and data science, that includes every major open-source programming language and software stack.† For example, you could download and run a [Julia container](https://hub.docker.com/_/julia/) right now if you so wished.
.footnote[† Building a Docker image on top of proprietary software is tricker and less common due to license restrictions. But it is still possible; see examples [here](https://github.com/mathworks-ref-arch/matlab-dockerfile) and [here](https://github.com/AEADataEditor/docker-stata).]
--
But for this course, we are primarily concerned with Docker images that bundle R applications.
The good news is that R has outstanding Docker support, primarily thanks to the **Rocker Project** ([website](https://www.rocker-project.org/) / [GitHub](https://github.com/rocker-org/rocker)).
- For the rest of today's lecture we will be using images from Rocker (or derivatives).
---
class: inverse, center, middle
name: r-base
# Example 1: Base R
---
# Example 1: Base R
For our first example, let's fire up a simple container that contains little more than a base R installation.
```{bash}
docker run --rm -it rocker/r-base
```
This will take a little while to download the first time (GIF on next slide). But the container will be ready and waiting for immediate deployment on your system thereafter.
--
A quick note on these `docker run` flags:
- `--rm` Automatically remove the container once it exits (i.e. clean up).
- `-it` Launch with interactive (`i`) shell/terminal (`t`).
- For a full list of flag options, see [here](https://docs.docker.com/engine/reference/run).
---
# Example 1: Base R (cont.)
As promised, here is a GIF of me running the command on my system. The whole thing takes about a minute and launches directly into an R session.
```{r docker_r_base_gif, eval = TRUE, echo=FALSE, out.width="75%"}
knitr::include_graphics("pics/docker-r-base.gif")
```
---
# Example 1: Base R (cont.)
To see a list of running containers on your system, in a new terminal window type:
```{bash}
docker ps
```
You should see something like:
```sh
CONTAINER ID IMAGE COMMAND CREATED STATUS PORTS NAMES
1fcdee074beb rocker/r-base "R" 35 seconds ago Up 35 seconds competent_elion
```
--
The container ID (here: `fcdee074beb`) is probably the most important bit of information.
We'll be using container IDs later in the lecture. For now, just remember that you can grab them with the `$ docker ps` command.
---
# Example 1: Base R (cont.)
Your base R container should have launched directly into R. Feel feel to kick the tyres. Do some addition, run a regression on the `mtcars` dataset, etc.
--
To exit the container, simply quit R.
```{r}
q()
```
Check that it worked:
```{bash}
docker ps
```
--
name: shell
BTW, if you don't want to launch directly into your container's R console, you can instead start it in the bash shell.
```{bash}
docker run --rm -it rocker/r-base /bin/bash
```
This time to close and exit the container, you need to exit the shell, e.g.
```
root@09dda673a187:/# exit
```
---
class: inverse, center, middle
name: r-dev
# Example 2: R-dev
---
# Example 2: R-dev
One of Docker's exemplar uses is testing software ahead of time. For example, we can safely test a new version of R in a Docker container before upgrading.
--
In that vein, we can also test the development version of R via the [`rocker/drd`](https://hub.docker.com/r/rocker/drd) image.
- At the time of writing this slide, the release of R version 4.1.0 was just a few days away. So, this provides a convenient way to test drive some of the [new features](https://cran.rstudio.com/) (a native pipe, lambda functions, etc.)
```{bash}
docker run --rm -it rocker/drd
```
```{r r_dev_pipe_gif, eval = TRUE, echo=FALSE, out.width="75%"}
knitr::include_graphics("pics/r-dev-pipe.gif")
```
---
class: inverse, center, middle
name: rstudio+
# Example 3: RStudio+
---
# Example 3: RStudio+
The Rocker Project works by layering Docker images on top of each other in a [grouped stack](https://github.com/rocker-org/rocker#use-cases). An important group here is the [**versioned**](https://github.com/rocker-org/rocker-versioned2#version-stable-rocker-images-for-r--400) stack.
--
Allows us to easily spin up different versions of R (3.6.1, 4.0.2, etc), plus extra layers.
---
# Example 3: RStudio+ (cont.)
Let's try the [`tidyverse`](https://hub.docker.com/r/rocker/tidyverse) image from this versioned stack, which layers base R + RStudio + tidyverse. I'll specify R 4.0.0 as my base image.
*Again, this next line will take a minute or three to download and extract the first time. But the container will be ready for immediate deployment on your system thereafter.*
---
name: tverseinit
count: false
# Example 3: RStudio+ (cont.)
Let's try the [`tidyverse`](https://hub.docker.com/r/rocker/tidyverse) image from this versioned stack, which layers base R + RStudio + tidyverse. I'll specify R 4.0.0 as my base image.
```{bash}
docker run -d -p 8787:8787 -e PASSWORD=pswd123 rocker/tidyverse:4.0.0
```
- `-d` Detach (i.e. run as background process).
- `-p 8787:8787` Share a port with the host computer's browser.
- `-e PASSWORD=pswd123` Password for logging on to RStudio Server.
- `rocker/tidyverse:4.0.0` Use the [`tidyverse`](https://hub.docker.com/r/rocker/tidyverse) image built on top of R 4.0.0.
--
If you run this... nothing seems to happen. Don't worry, I'll explain on the next slide.
- Confirm for yourself that it's actually running with `$ docker ps`. (Windows users should definitely do this because you'll need the container ID shortly.)
--
name:username
**Aside.** All RStudio(+) images in the Rocker stack require a password. Pretty much anything you want except "rstudio", which is the default username. On that note, if you don't like the default "rstudio" username, you can choose your own by adding `-e USER=myusername` to the above command.
---
# Example 3: RStudio+ (cont.)
Unlike, the "r-base" container, this time we aren't immediately taken to our R environment.
**Reason:** Our container is running RStudio Server, which needs to be opened up in a browser.
--
So we need to point our browsers to the relevant IP address _plus_ the opened `:8787` port:
- **Linux/Mac:** http://localhost:8787
- **Windows:** Type in `$ docker inspect | grep IPAddress` to get your IP address (see [here](https://stackoverflow.com/a/46310428)). Note that this information was also displayed when you first launched your Docker Quickstart Terminal. For example:
.small75[
```
## .
## ## ## ==
## ## ## ## ## ===
/"""""""""""""""""\___/ ===
~~~ {~~ ~~~~ ~~~ ~~~~ ~~~ ~ / ===- ~~~
\______ o __/
\ \ __/
\____\_______/
docker is configured to use the default machine with IP `192.168.99.100`
For help getting started, check out the docs at https://docs.docker.com
```
]
--
name: login
So this Windows user would point their browser to http://192.168.99.100:8787.
---
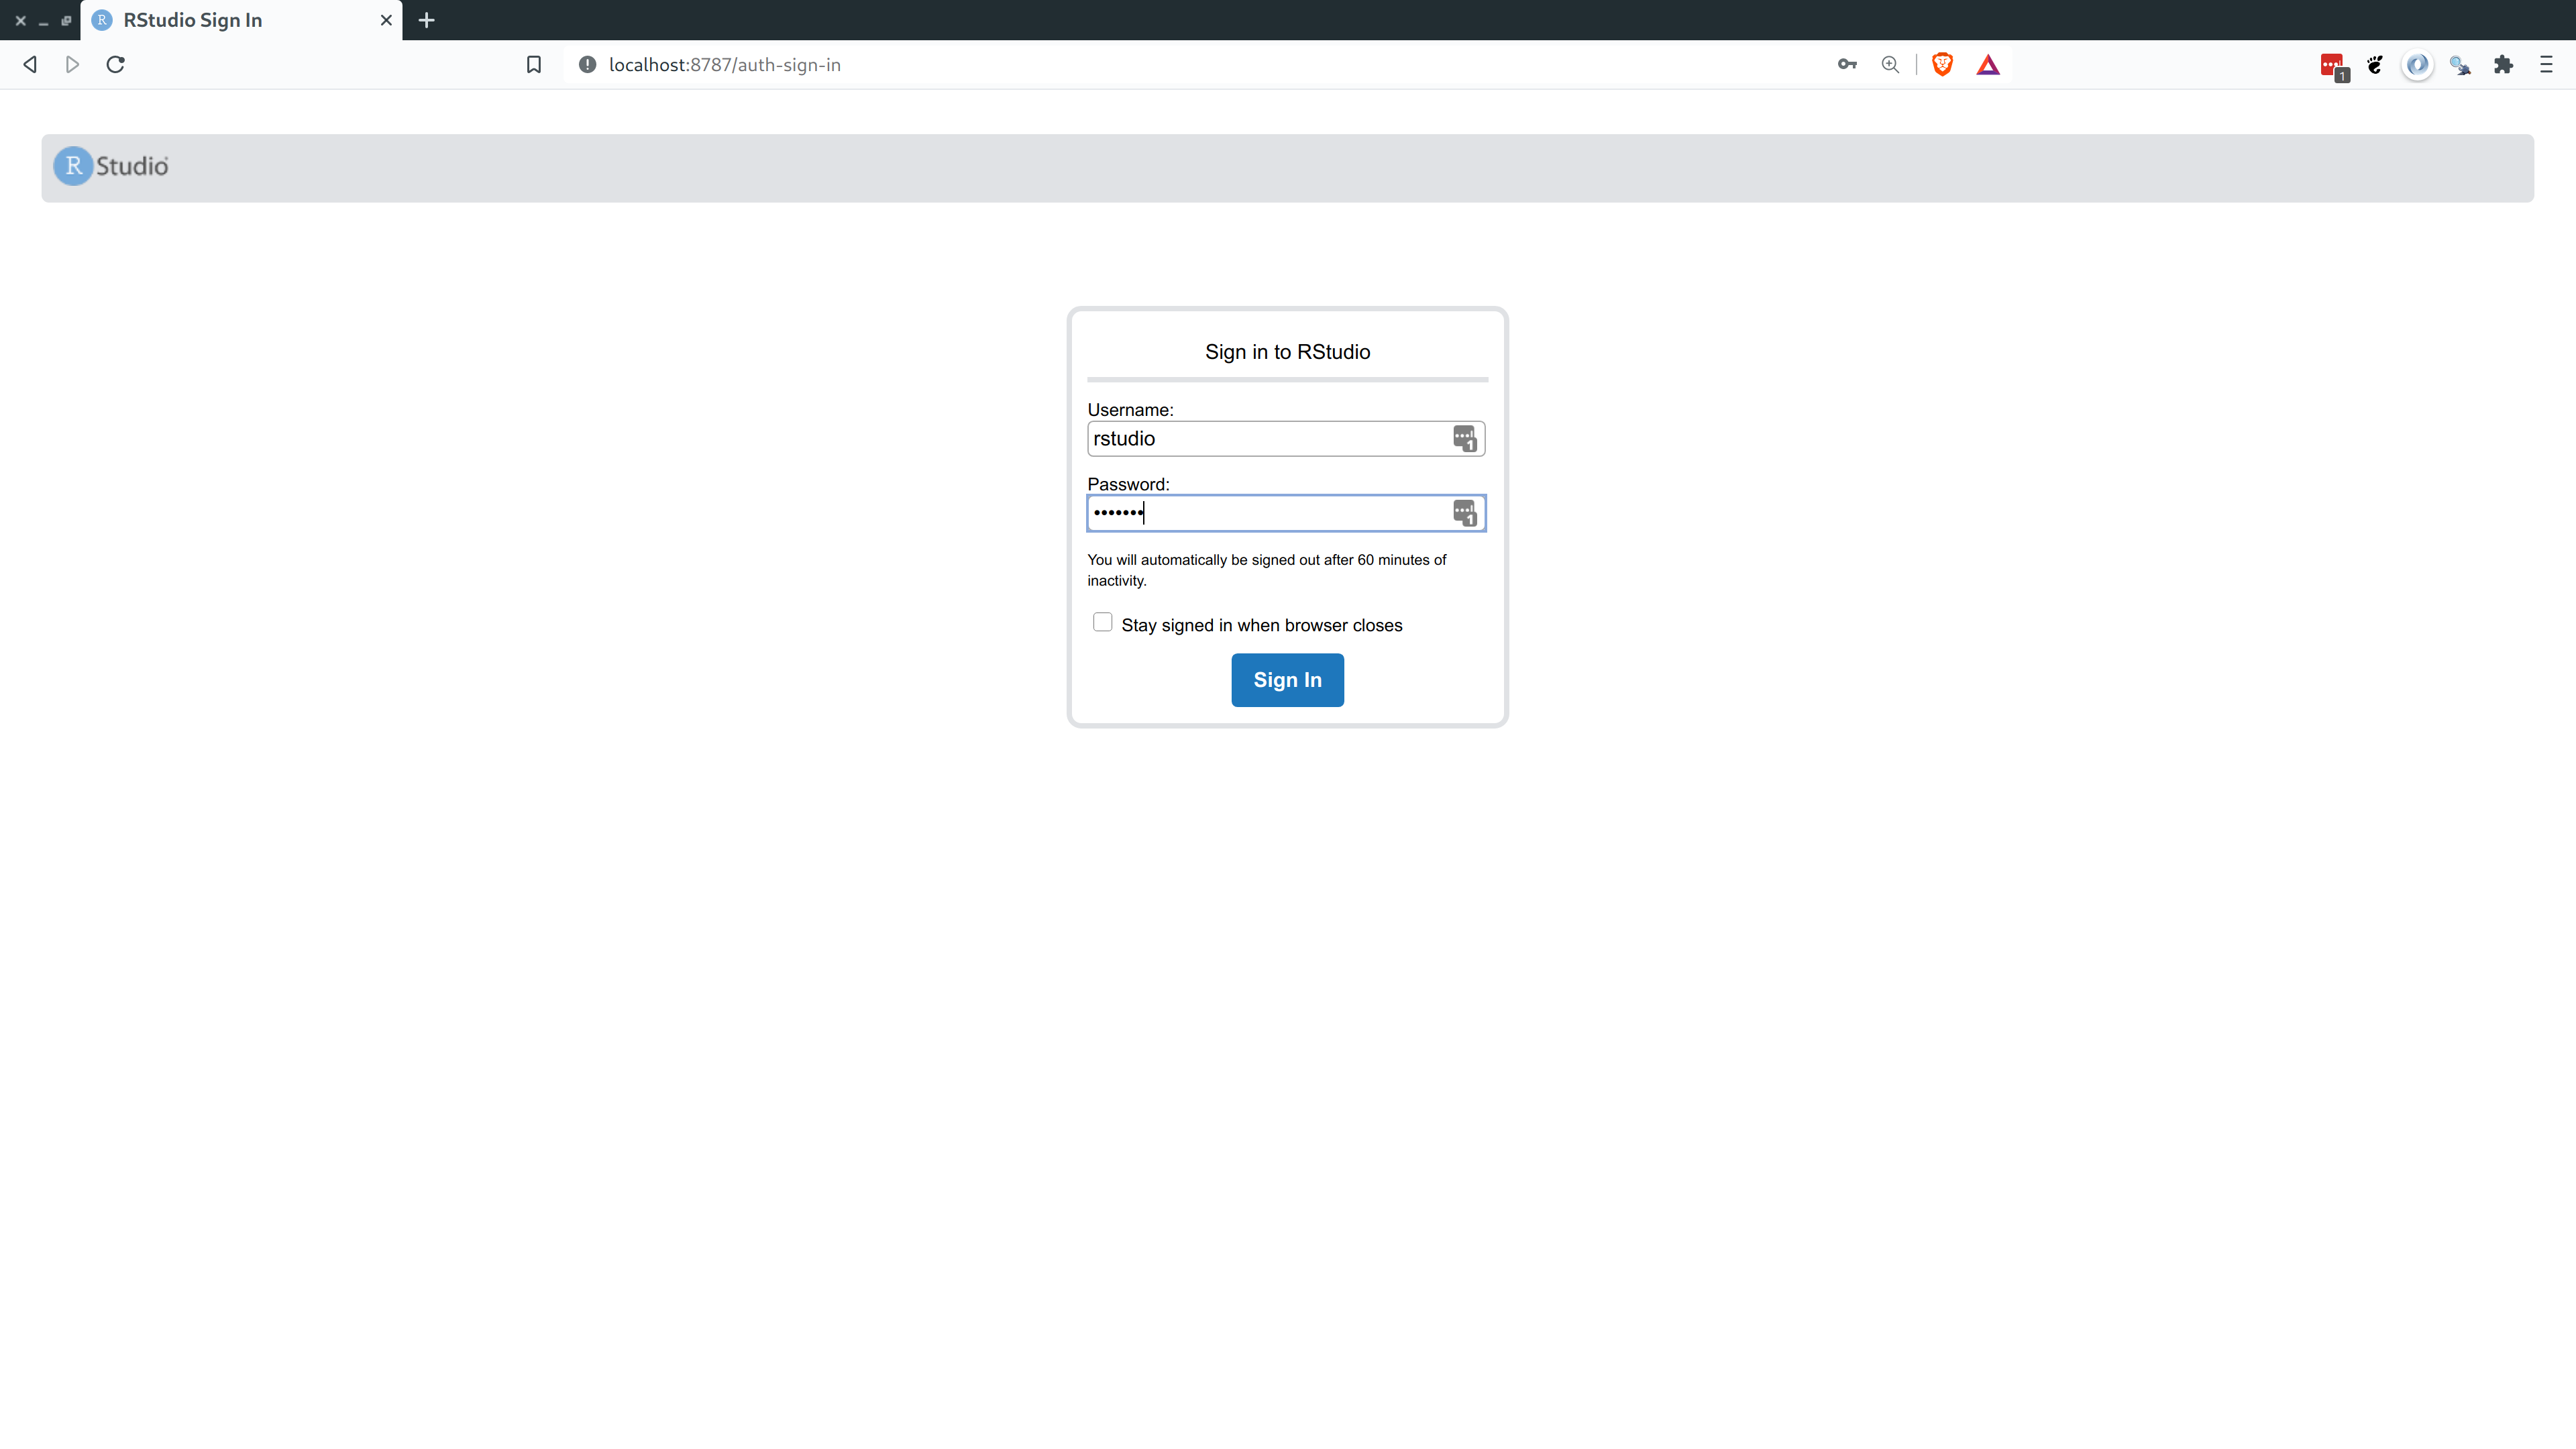
# Example 3: RStudio+ (cont.)
Here's the login-in screen that I see when I navigate my browser to the relevant URL.
--
Sign in with your "rstudio" + "pswd123" credential combination.
---
# Example 3: RStudio+ (cont.)
And here I am in RStudio Server running through Docker! (Pro-tip: Hit F11 to go full-screen.)

---
count: false
# Example 3: RStudio+ (cont.)
I can also load the **tidyverse** straight away. (We can ignore those warning messages.)

---
# Example 3: RStudio+ (cont.)
To stop this container, you would grab the container ID (i.e. with `$ docker ps`) and then run:
```{bash}
docker stop
```
Please don't do this yet, however! I want to continue using this running container in the next section.
--
**Aside:** Recall that we instantiated this container as a detached/background process (`-d`).
```{bash}
docker run `-d` -p 8787:8787 -e PASSWORD=pswd123 rocker/tidyverse:4.0.0
```
If you dropped the `-d` flag and re-ran the above command, your terminal would stay open as an ongoing process. (Try this for yourself later.)
- Everything else would stay the same. You'd still log in at `:8787`, etc.
- However, I wanted to mention this non-background process version because it offers another way to shut down the container: Simply type `CTRL+c` in the (same, ongoing process) Terminal window. Again, try this for yourself later.
---
# Example 3: RStudio+ (cont.)
I'll end this example by reiterating the stacked (or _layered_) nature of the Docker workflow.
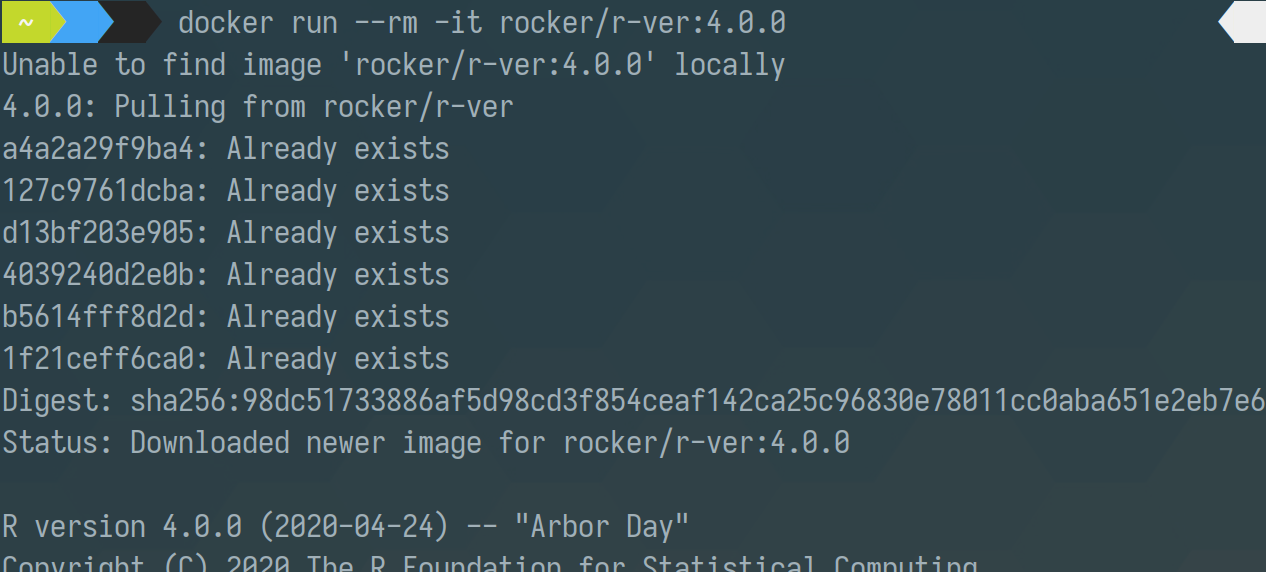
To prove this, consider what happens when I instantiate the [`r-ver:4.0.0`](https://hub.docker.com/r/rocker/r-ver) image at the base of Rocker's versioned stack.
--
---
# Example 3: RStudio+ (cont.)
I'll end this example by reiterating the stacked (or _layered_) nature of the Docker workflow.
To prove this, consider what happens when I instantiate the [`r-ver:4.0.0`](https://hub.docker.com/r/rocker/r-ver) image at the base of Rocker's versioned stack.
**TL;DR** I am immediately taken into a running R 4.0.0 container.
- All those messages — `a4a2a29f9ba4: Already exists` etc. — are Docker confirming that it already has the necessary layers for building this (parent) container.
- No need to download or build any new layers.
--
This layered approach is not unique to the Rocker stack. It is integral to Docker's core design.
- Cache existing layers. Only (re)build what we have to do.
- Modularity reduces build times, makes containers easy to share and customize.
--
All of which provides a nice segue to our next section...
---
class: inverse, center, middle
name: own
# Write your own Dockerfiles & images
---
# Add to an existing container
The easiest way to start writing our own Docker images is by layering on top of existing containers.
- Remember: Like an [ogre](https://www.youtube.com/watch?v=aJQmVZSAqlc), Docker is all about the layers.
--
Let's see a simple example where we add an R library to our `tidyverse:4.0.0` image. First, make sure that the container is still running. You should see something like:
```{bash}
docker ps
```
```bash
CONTAINER ID IMAGE COMMAND CREATED STATUS PORTS NAMES
802dbd3841c7 rocker/tidyverse:4.0.0 "/init" 8 minutes ago Up 8 minutes 0.0.0.0:8787->8787/tcp, :::8787->8787/tcp sweet_maxwell
```
*(If you don't see something like the above, please re-start your container and then log-in to RStudio Server, using the same steps that we saw [previously](#tverseinit).)*
--
Once you are in RStudio, install **data.table** like you would any normal R library.
- I'm not going to show this with a GIF, but either use RStudio's library installer or run `install.packages("data.table")`.
---
# Add to an existing container (cont.)
Okay, data.table should now be installed on your running container.
**Question:** If you stopped your container and restarted it, would data.table still be there?
--
**Answer:** No!
--
Remember, the whole point of Docker is to always start from the same pristine state.
--
So, we have to commit these changes as part of a new (different) pristine state. The good news is that this is going to look very similar to our Git workflow.
I'm going to show you how on the next slide to keep everything in one place...
---
# Add to an existing container (cont.)
**Step 1:** Run `docker ps` to ID the running container. We've already done this, but still...
```{bash}
docker ps
```
```bash
CONTAINER ID IMAGE COMMAND CREATED STATUS PORTS NAMES
802dbd3841c7 rocker/tidyverse:4.0.0 "/init" 8 minutes ago Up 8 minutes 0.0.0.0:8787->8787/tcp, :::8787->8787/tcp sweet_maxwell
```
--
**Step 2.** Grab the container ID (in my case: `802dbd3841c7`). We're going to use this to commit our changes and create a new Docker image, which I'll call `tidyverse_dt`.
```{bash}
docker commit -m "tidverse + data.table" 802dbd3841c7 tidyverse_dt:4.0.0
```
Again, this should feel _very_ familiar to our Git workflow. We even wrote ourselves a helpful commit message. Note that I added a version tag (i.e. `:4.0.0`). This is optional, but good practice. Here, I'm reminding myself that I've built on top of the R 4.0.0 versioned stack.
--
**Step 3.** Profit. (There's no step 3. Just confirm for yourself that your image has been created.)
```{bash}
docker images
```
---
# Adding things outside of R?
For the simple example on the previous slide, we installed a single R package. But the process would work exactly the same if we did any other operations from within R(studio).
- Install multiple packages
- Save datasets, scripts, figures, etc.
--
**Question:** What happens if we want to install/update something outside of R(Studio)? Say, Ubuntu system libraries or another program like Python?
--
**Answer:** It still works exactly the same. You just have to add things through your container's bash shell. Either:
- Launch directly into the shell to start with (remember: [here](#shell)). Or,
- Use [`docker exec`](https://docs.docker.com/engine/reference/commandline/exec/) to open the shell of a running container. For example:
$ docker exec -it 802dbd3841c7 bash
root@802dbd3841c7:/# apt update -y && apt install htop
root@802dbd3841c7:/# htop ## Show all available CPU cores. Press 'q' to quit.
--
(Obviously, you'd now have to commit this change to add `htop` to your image.)
---
# Aside: Stop your container(s)
Okay, now is a good time to stop your container if you haven't done so already. Grab your container ID and run:
```{bash}
docker stop
```
Alternatively, you can stop all running containers with the following command:
```{bash}
docker stop $(docker ps -q)
```
---
# Write your own Dockerfile
The interactive approach to building Docker images — i.e. committing changes to a running container — is a convenient way to get up and running quickly. However, at some point you'll probably want to start writing your own `Dockerfiles`.
- Remember: `Dockerfiles` are the "sheet music" of the whole operation. These are simple text files that provide the full set of (shell) instructions for building our Docker images.
--
There is a whole host of [commands and considerations](https://docs.docker.com/develop/develop-images/dockerfile_best-practices/) for writing `Dockerfiles` — all of which I am going to skip for this lecture. (We simply don't have the time.)
--
BUT... I will briefly say that the Rocker Project again has our backs with a bunch of [ready-made scripts](https://github.com/rocker-org/rocker-versioned2#modifying-and-extending-images-in-the-new-architecture) for building on and extending their Docker images.
--
For example, if we wanted to modify the `r-ver4.0.0` image so that it also included Python, our Dockerfile would be as simple as the following two lines:
```bash
FROM rocker/r-ver:4.0.0
RUN /rocker_scripts/install_python.sh
```
.pull-right[*(Continues on next slide.)*]
---
# Write your own Dockerfile (cont.)
```bash
FROM rocker/r-ver:4.0.0
RUN /rocker_scripts/install_python.sh
```
--
Try this yourself by creating a file called `Dockerfile`† comprising the above lines.
.footnote[†Every `Dockerfile` is called exactly that. Only one `Dockerfile` is allowed per (sub) directory.]
--
Next, build your Docker image from this `Dockerfile` using the following shell command. I'm going to call my image `r_py` and give it the "4.0.0" version stamp (both choices being optional). **Important:** Make sure that your shell/terminal is in the same directory as the `Dockerfile`when you run this command.
```{bash}
# docker build --tag :
docker build --tag r_py:4.0.0 .
```
--
This will take a minute to pull everything in. But your `r_py` image with be ready for immediate deployment thereafter, and now includes Python and [reticulate](https://rstudio.github.io/reticulate/).
```{bash}
docker run -it --rm r_py:4.0.0
```
---
# Write your own Dockerfile (cont.)
Okay, one last tip about writing your own Dockerfiles. Let's say we wanted to add an R package (e.g. data.table) to our `r_py` image at build time. How could we do this?
--
Well, remember that Dockerfiles are (basically) just a set of shell instructions. So we can tell our Dockerfile to install an R package via an appropriate bash command like `Rscript`.†
- We also need to pre-pend any bash command with the special Docker verb `RUN`.
.footnote[† We covered `Rscript` back in the [shell lecture](https://raw.githack.com/uo-ec607/lectures/master/03-shell/03-shell.html#rscript).]
--
Our Dockerfile thus becomes:
```bash
FROM rocker/r-ver:4.0.0
RUN /rocker_scripts/install_python.sh
RUN R -e "install.packages('data.table')"
```
--
If you build this image you'll see that it completes almost instantly... because the first two lines (i.e. layers) have already been cached. Clever!
---
# Automated Dockerfiles
Say that you have an existing research project or repo. Is there an easy way to write a Dockerfile / Docker image based on the contents?
**Answer:** Yes!
I don't have time to go into details, but automated Docker tools include:
- [`containerit`](https://o2r.info/containerit/)
- [`repo2docker`](https://repo2docker.readthedocs.io/en/latest/)
Check them out. (I have a small `containerit` demo [here](https://github.com/grantmcdermott/containerit-demo).)
---
# Docker Hub: Share your Docker images
So, you've written a cool Dockerfile that you want to share with world. What next?
--
You can share your Dockerfiles and images in various ways.
- For my research projects, I add a Dockerfile to the companion GitHub repo. This provides a convenient way for others to reproduce the (potentially complex) computing environment that I used for conducting my analysis. (Example [here](https://github.com/grantmcdermott/sceptic-priors#docker).)
The most popular way to share Docker images is by hosting them on [**Docker Hub**](https://hub.docker.com/).
- I'm not going to show you how to do that here. But the good news is that it's very straightforward. See [here](https://jsta.github.io/r-docker-tutorial/04-Dockerhub.html) for a quick walkthrough.
---
class: inverse, center, middle
name: share
# Sharing files with a container
---
# Prep: Stop all running containers
*This next section is all about sharing files and folders between your computer and a container. To avoid unexpected behaviour, it would be best to stop all running containers before proceeding.*
```{bash}
docker stop $(docker ps -q)
```
--
*You should be good to continue now...*
---
# Share files by mounting volumes
Each container runs in a sandboxed environment and cannot access other files and directories on your computer unless you give it explicit permission.
--
To share files with a container, the `-v` (mount volume) flag is your friend.
- Adopts a **LHS:RHS** convention, where LHS = `path/on/your/computer/` and RHS = `path/on/the/container`.
--
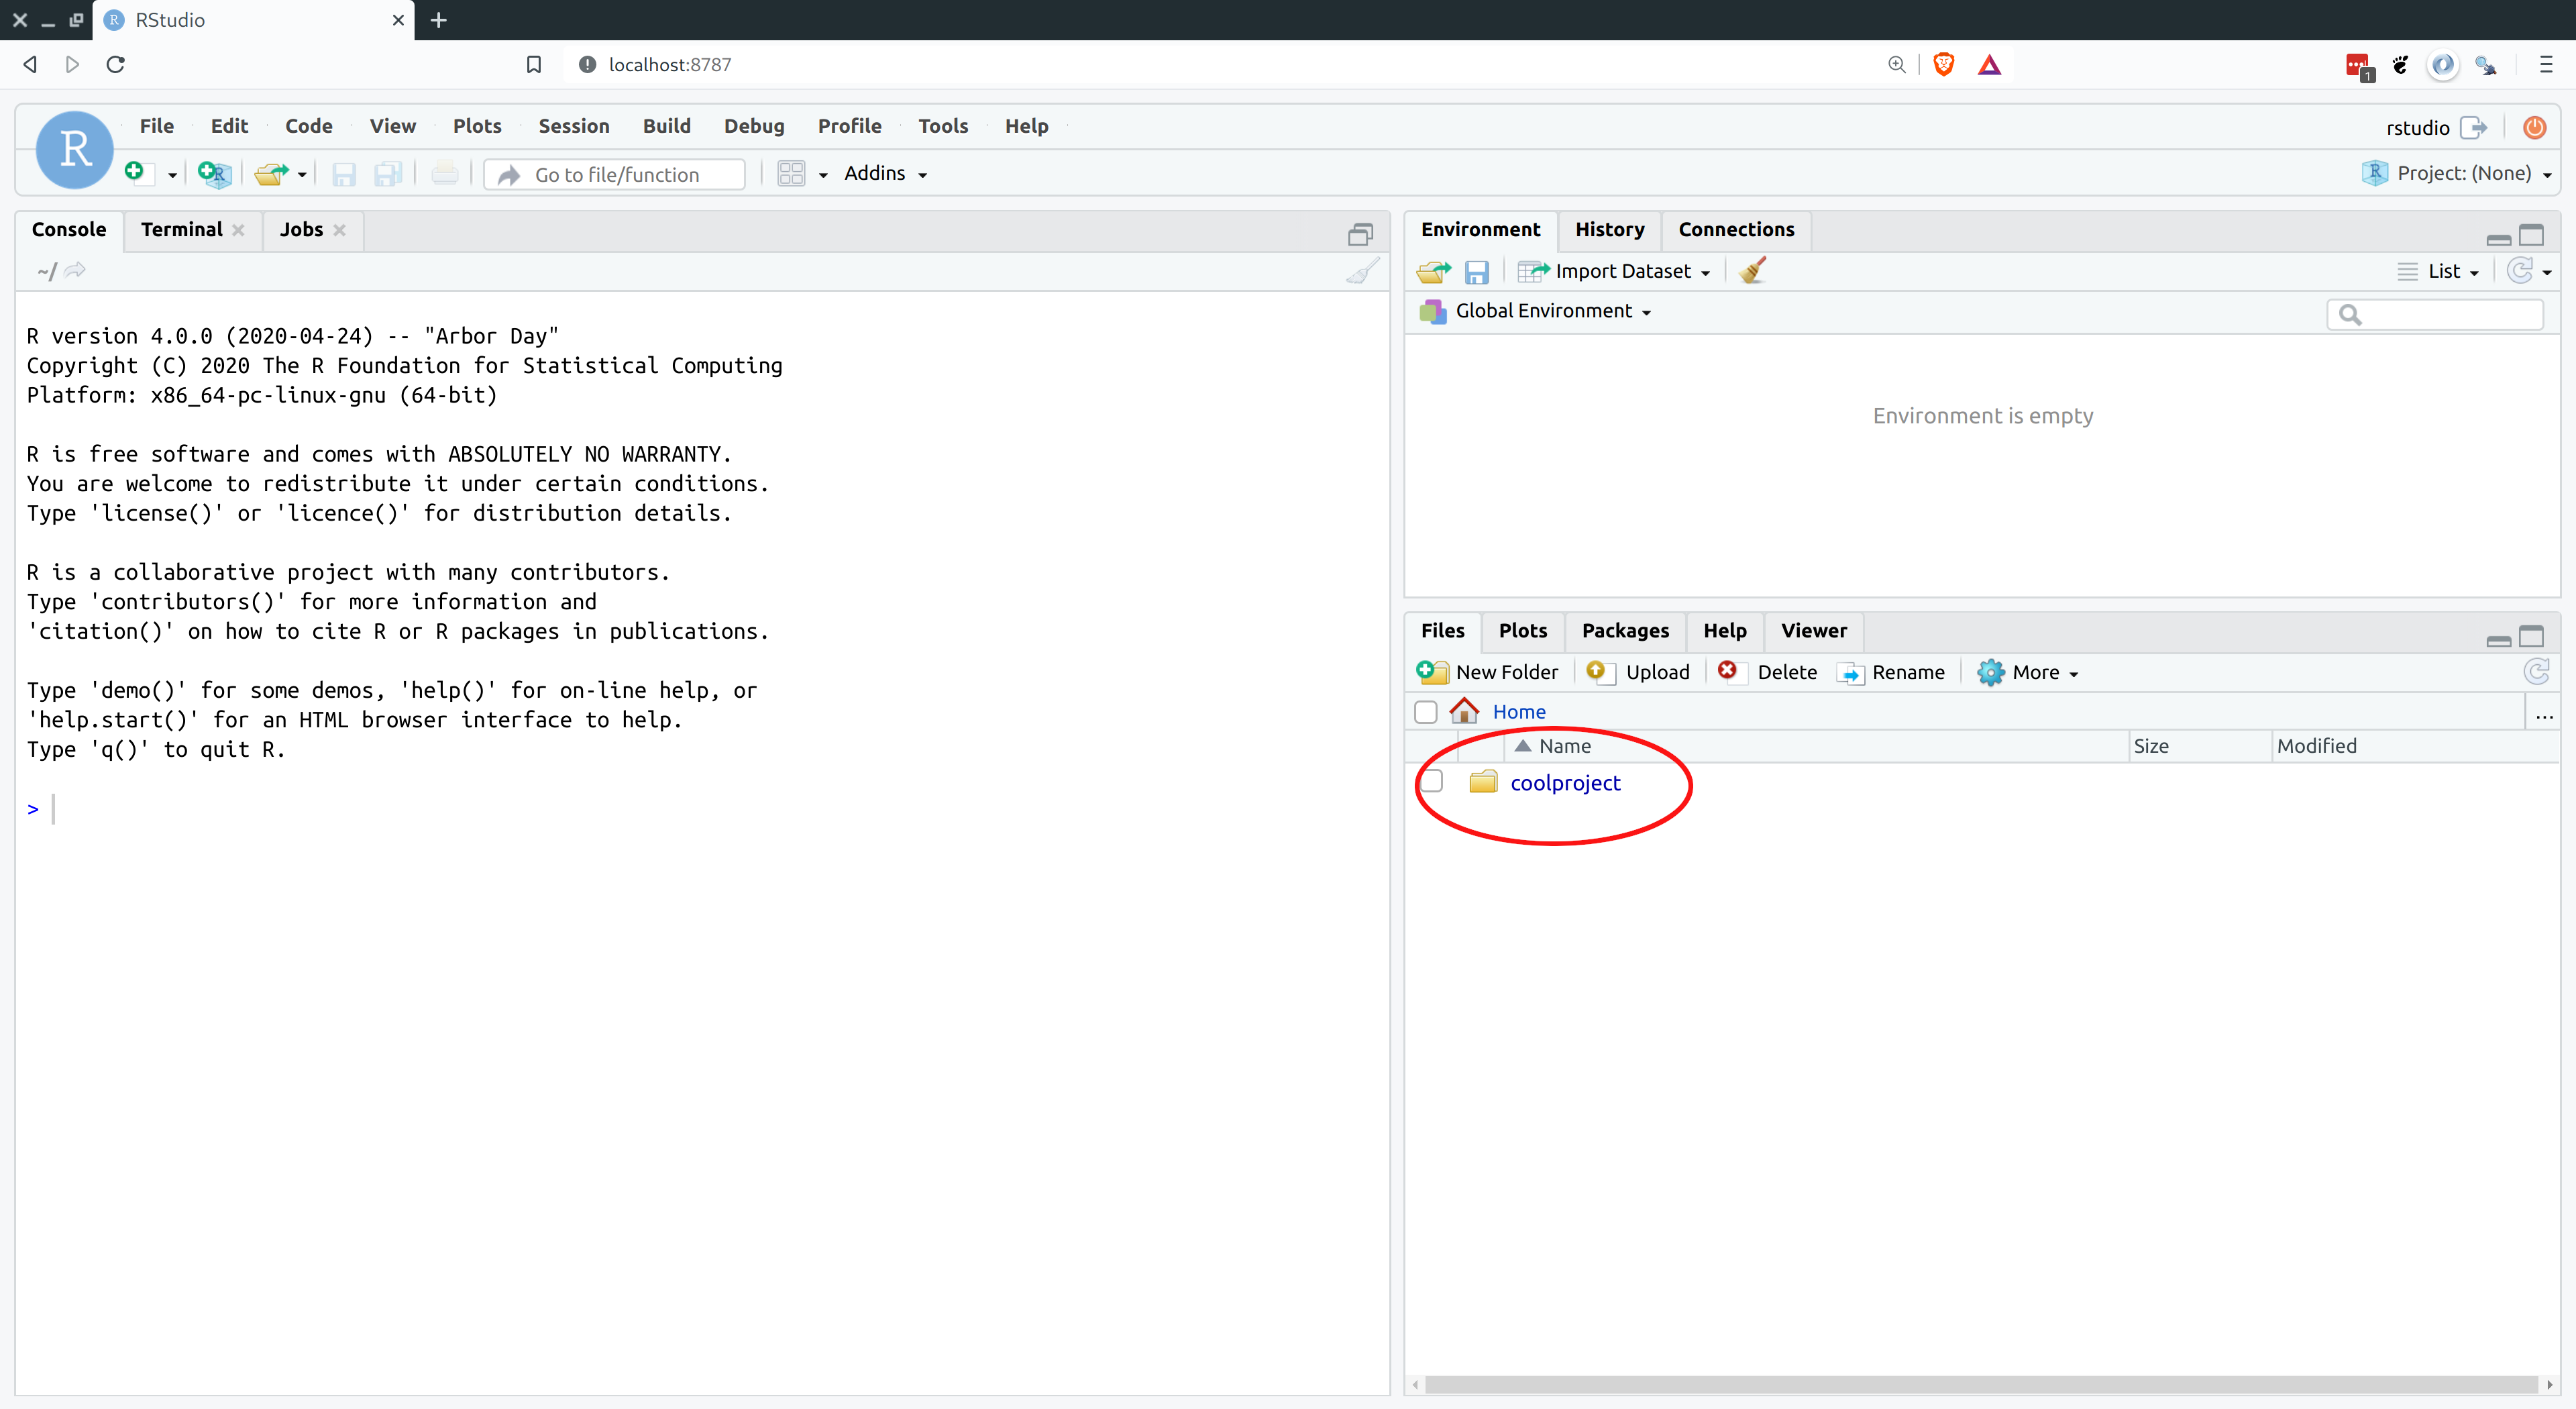
For example, say I have a folder on my computer located at `/home/grant/coolproject`. I can make this available to my "tidyverse" container by running:
```{bash}
docker run `-v /home/grant/coolproject:/home/rstudio/coolproject` \
-d -p 8787:8787 -e PASSWORD=pswd123 rocker/tidyverse:4.0.0
```
--
PS — I'll get back to specifying the correct RHS path in a couple of slides.
---
# coolproject
The coolproject directory is now available from RStudio running on the container.
---
# pwd
In the previous example, I provided the absolute LHS path to `/home/grant/coolproject`.
The reason is that Docker doesn't understand relative paths for mounting external volumes.
- E.g. I couldn't use `-v .:/home/rstudio` or `-v coolproject:home/rstudio`.
--
But there _is_ a convenient shortcut for mounting the host computer's present working directory: Use \`pwd\` (including the backticks).
```{bash}
docker run -v \`pwd`:/home/rstudio/coolproject \
-d -p 8787:8787 -e PASSWORD=pswd123 rocker/tidyverse:4.0.0
```
--
This shortcut effectively covers the most common relative path case (i.e. linking a container to our present working directory). You can also specify sub-directories.
- E.g. -v \`pwd\`/pics:/home/rstudio
---
# Choosing the RHS mount point
In the previous example, I specified the RHS mount point as `/home/rstudio/coolproject`. How did I know this would work?
--
The short answer is that `/home/rstudio` is the default user's home directory for images in the RStudio+ stack. If you're running a container from this stack, you should almost always start your RHS with this path root.†
.footnote[† Exception: If you assigned a different default user than "rstudio" ([back here](#username)).]
--
We have to be specific about mounting under the user's home directory, because RStudio Server limits how and where users can access files. (This is a security feature that we'll revisit in the next lecture on cloud computing.)
--
OTOH the `/coolproject` directory name is entirely optional. Call it whatever you want... though using the same name as the linked computer directory obviously avoids confusion.
- Similarly, you're free to add a couple of parent directories. I could have used `-v /home/grant/coolproject:/home/rstudio/parentdir1/parentdir2/coolproject` and it would have worked fine.
---
# Choosing the RHS mount point (cont.)
Choosing a specific RHS mount point is less important for non-RStudio+ containers.
Still, be aware that the `/home/rstudio` path won't work for our r-base container from earlier.
- Reason: There's no "rstudio" user. (Fun fact: When you run an r-base container you are actually logged in as root.)
--
For non-Rstudio+ containers, I recommend a general strategy of mounting external volumes on the dedicated `/mnt` directory that is standard on Linux. For example:
```
$ docker run -it --rm -v /home/grant/coolproject:/mnt/coolproject r-base /bin/bash
root@958d28472eb0:/# cd /mnt/coolproject/
root@958d28472eb0:/mnt/coolproject# R
```
---
class: inverse, center, middle
name: clean
# Cleaning up
---
# Docker images
As I keep emphasizing, Docker is fantastic. It allows us to very quickly share and access different software environments, with all the reproducibility and deployment benefits that this entails.
--
The "downside" of this convenience is that Docker images require disk space.
- For example, the `tidyverse` image that we spun up earlier takes up 2.6 GB.
- Not _huge_ given then size of modern hard drives... but you can quickly eat up a good chunk of disk space once you start building Docker images regularly.
--
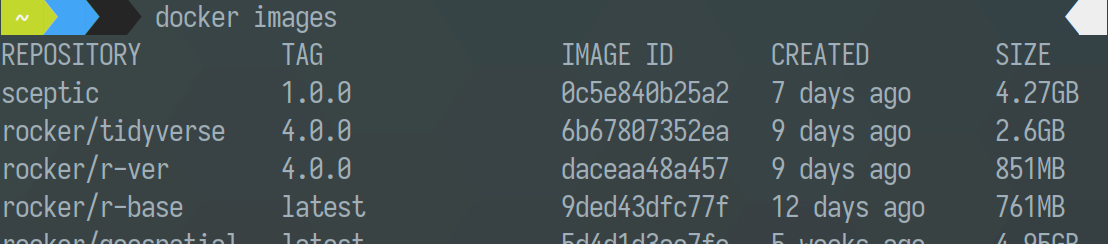
To see a list of the images1 on your system, simply type:
```{bash images_list}
docker images
```
.footnote[1 [Remember](#imagevscontainer): Images are distinct from containers.]
---
# Removing images
Running the previous command on my system, here's part of what I see.
--
To remove a particular image (or set of images), we use the `docker rmi ` command. For example, I could remove both the "rocker/tidyverse" and "rocker/r-ver" images above with:
```{bash}
docker rmi 6b67807352ea daceaa48a457
```
(Feel free to try this yourself. But don't worry if you'd like to keep the equivalent images on your machine for now.)
---
# Pruning
Recall that Docker makes heavy used of cached layers to speed up build times.
I mention this because, while the `docker rmi` command normally works great, it doesn't necessarily handle "dangling" images or build caches.
- Basically, intermediate objects that are no longer being used.
This should not matter much for the examples that we've seen today. But these dangling images can waste quite a bit of disk space once you've been building your own Dockerfiles for a while.
--
To fix this, we use the more aggressive `$ docker