🏁 2025-10-4 Test Day
MXK Karting Performance Analysis
Component Testing & Optimization
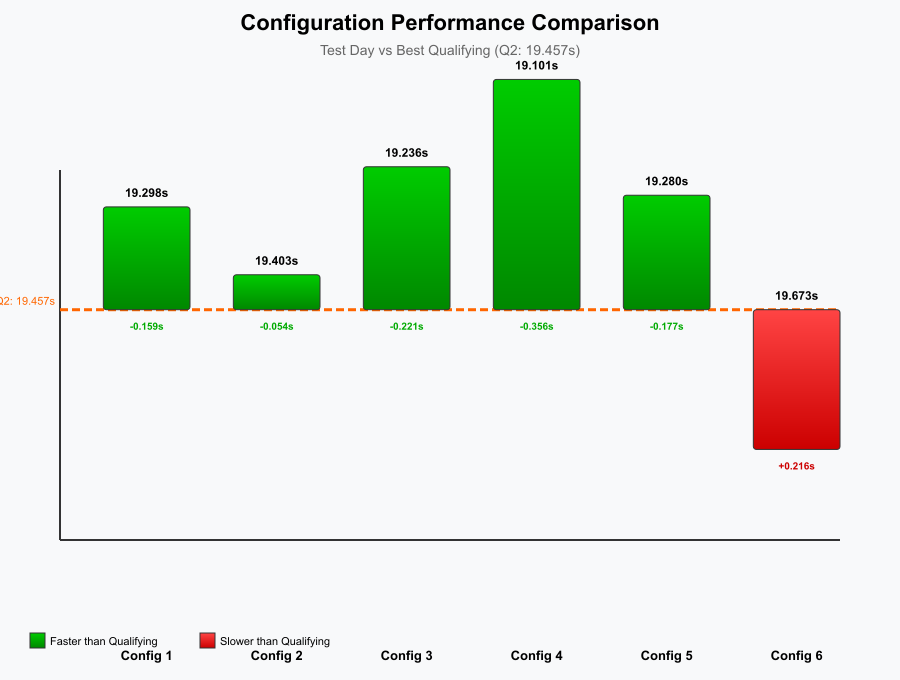
6 Configurations | 10 Sessions | Race 23 Q2 Baseline: 19.457s
⚙️ Configurations Tested
| Config | Flywheel | Carburetor | Exhaust | Best Lap |
|---|---|---|---|---|
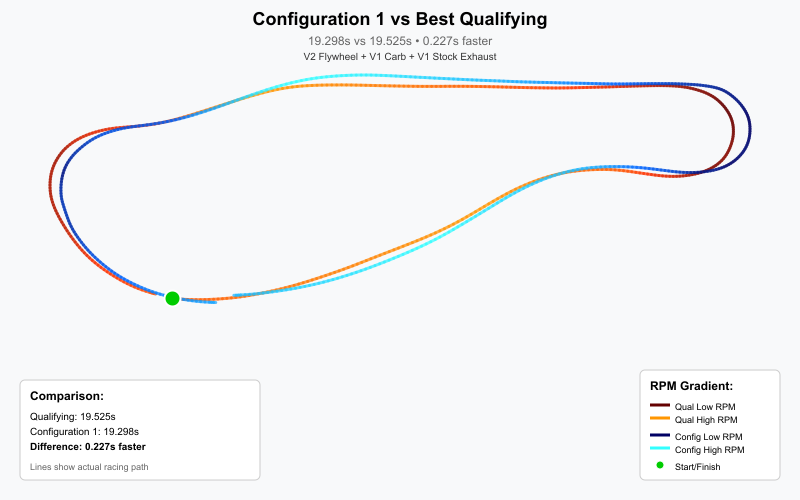
| Config 1 | V2 High-Performance | V1 | V1 Stock | 19.298s |
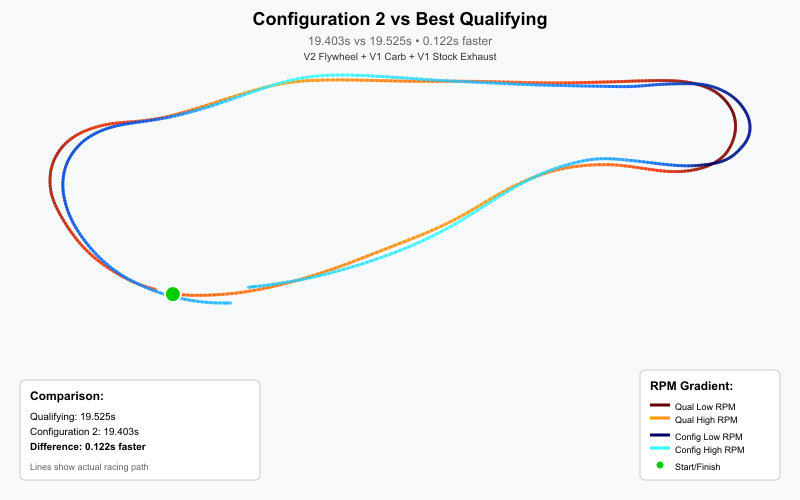
| Config 2 | V2 High-Performance | V1 | V1 Stock | 19.403s |
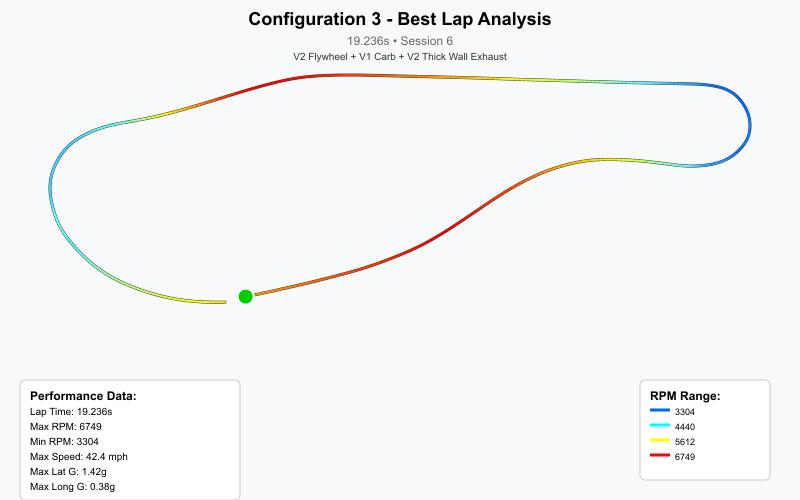
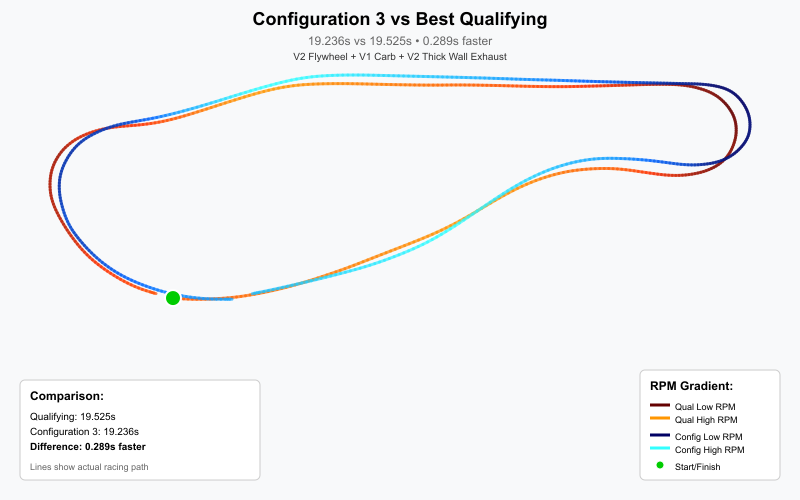
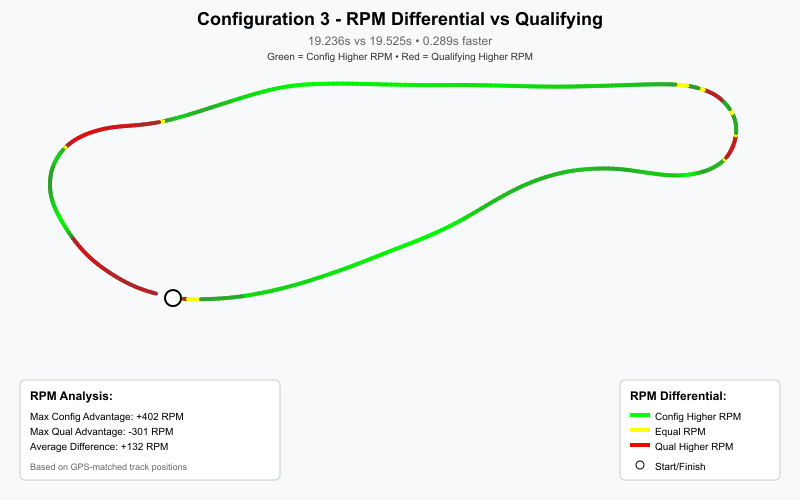
| Config 3 | V2 High-Performance | V1 | V2 Thick Wall | 19.236s |
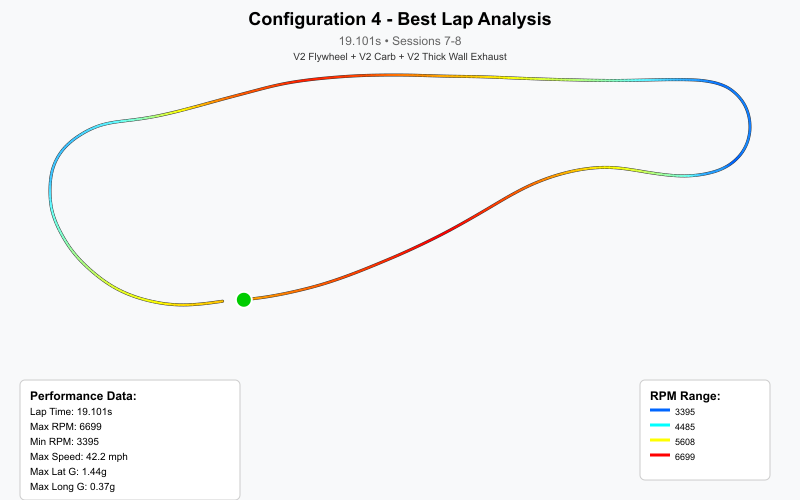
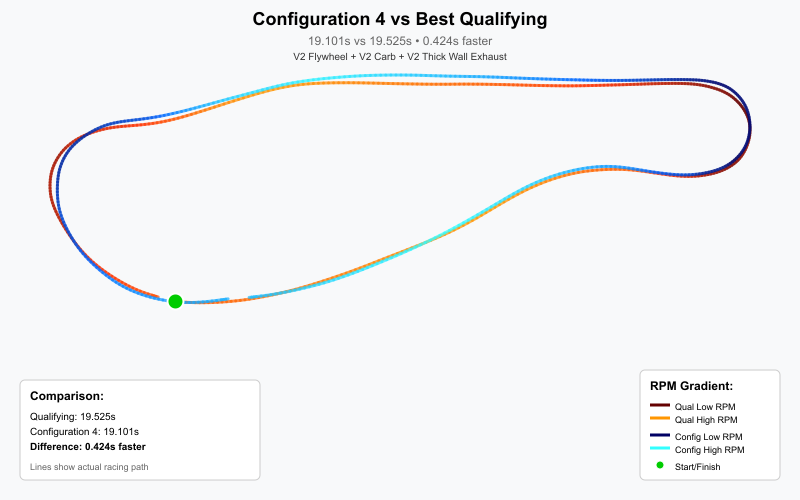
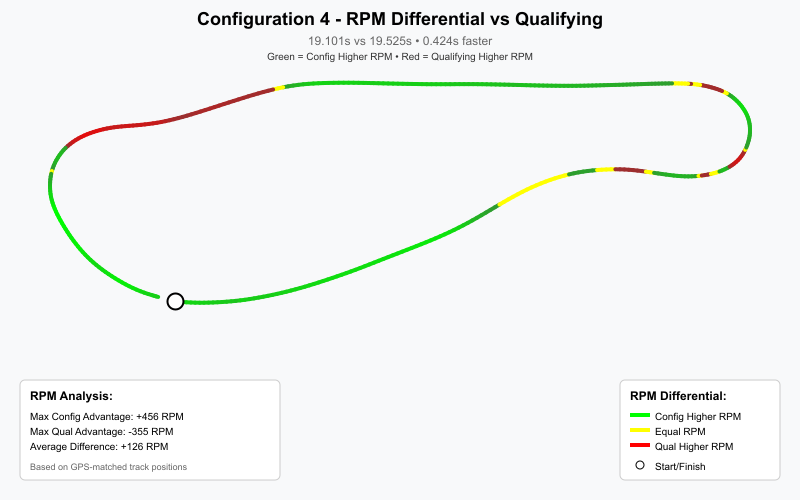
| Config 4 🏆 | V2 High-Performance | V2 | V2 Thick Wall | 19.101s |
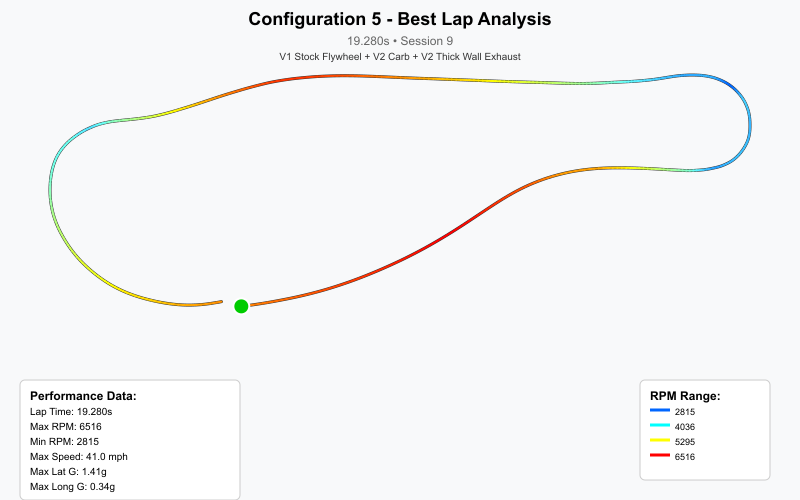
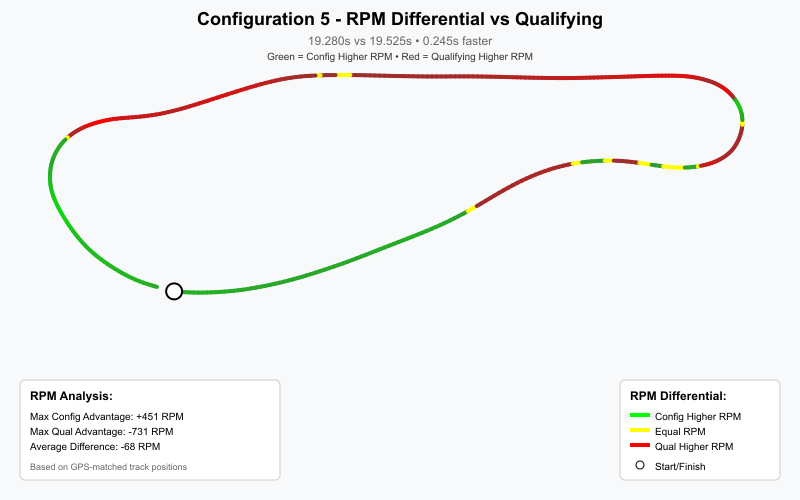
| Config 5 | V1 Stock | V2 | V2 Thick Wall | 19.280s |
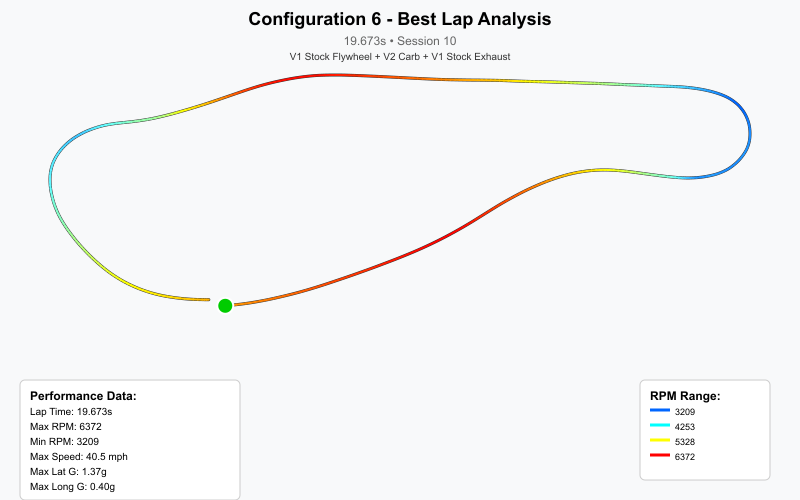
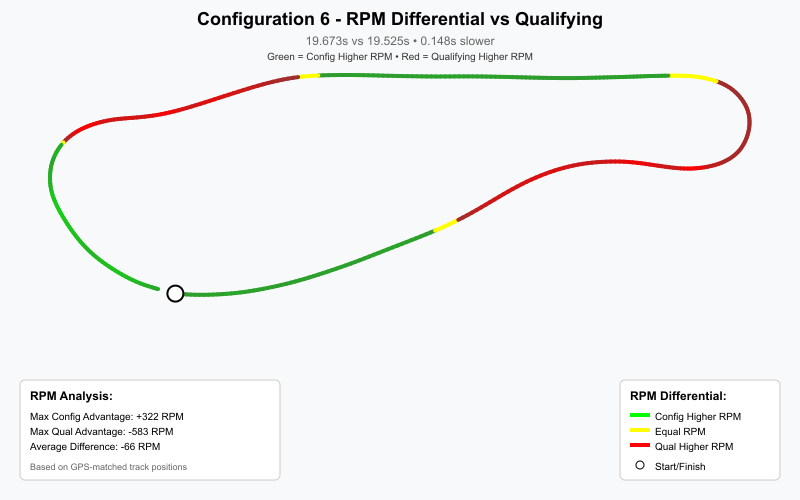
| Config 6 | V1 Stock | V2 | V1 Stock | 19.673s |
Baseline: Race 23 Q2 Qualifying - 19.457s
📊 Executive Summary
- ✓ Configuration 4 achieved the fastest lap: 19.101s
- ✓ 0.356s faster than Race 23 Q2 qualifying baseline
- ✓ 5 of 6 configurations beat qualifying
- ✓ V2 Flywheel + V2 Carb + V2 Exhaust = Optimal Setup
- ✓ Performance range: 0.572s spread between best and worst
Performance Comparison
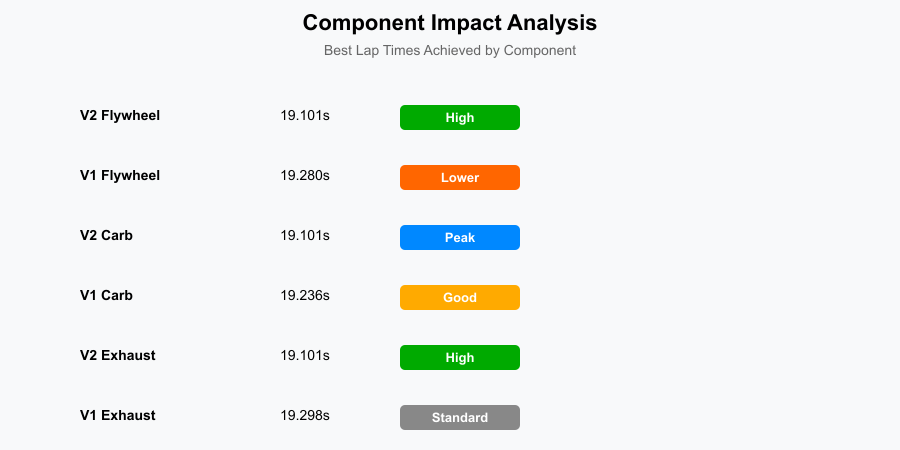
Component Impact Analysis
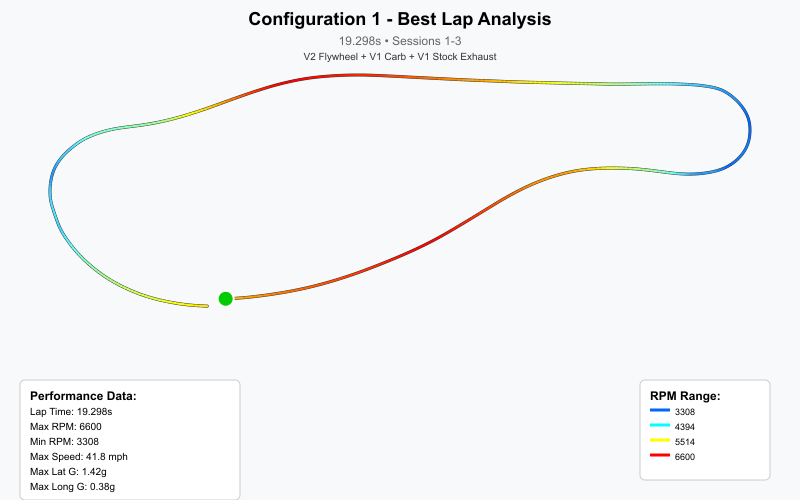
Configuration 1 (Sessions 1-3: Break-in)
🔧 Flywheel: V2 High-Performance
⚙️ Carburetor: V1
💨 Exhaust: V1 Stock
📅 Sessions: 1-3 (includes engine break-in laps)
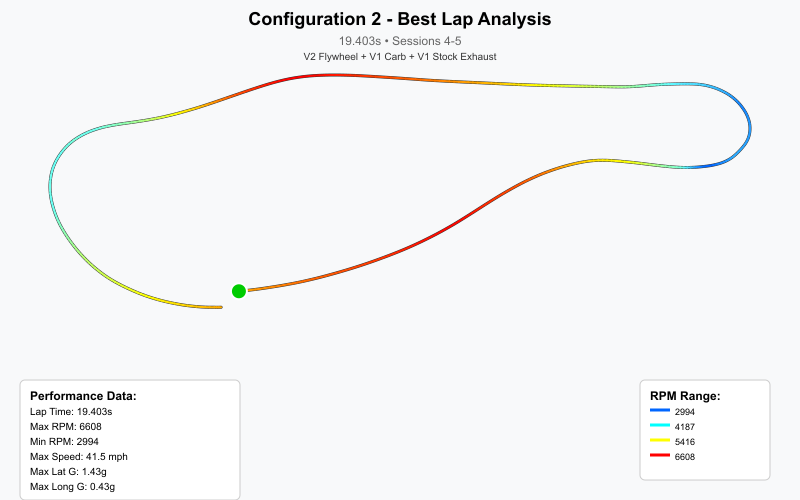
Configuration 2 (Sessions 4-5: Same Setup)
🔧 Flywheel: V2 High-Performance (same as Config 1)
⚙️ Carburetor: V1 (same as Config 1)
💨 Exhaust: V1 Stock (same as Config 1)
📅 Sessions: 4-5 (post warm-up, pushing hard)
Configuration 3
🔧 Flywheel: V2 High-Performance
⚙️ Carburetor: V1
💨 Exhaust: V2 Thick Wall
📅 Sessions: 6
Configuration 4 🏆 WINNER
🔧 Flywheel: V2 High-Performance
⚙️ Carburetor: V2
💨 Exhaust: V2 Thick Wall
📅 Sessions: 7-8
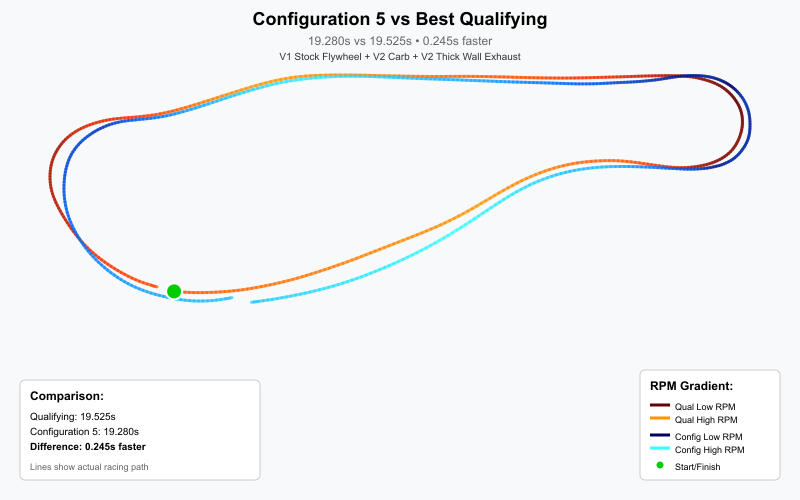
Configuration 5
🔧 Flywheel: V1 Stock
⚙️ Carburetor: V2
💨 Exhaust: V2 Thick Wall
📅 Sessions: 9
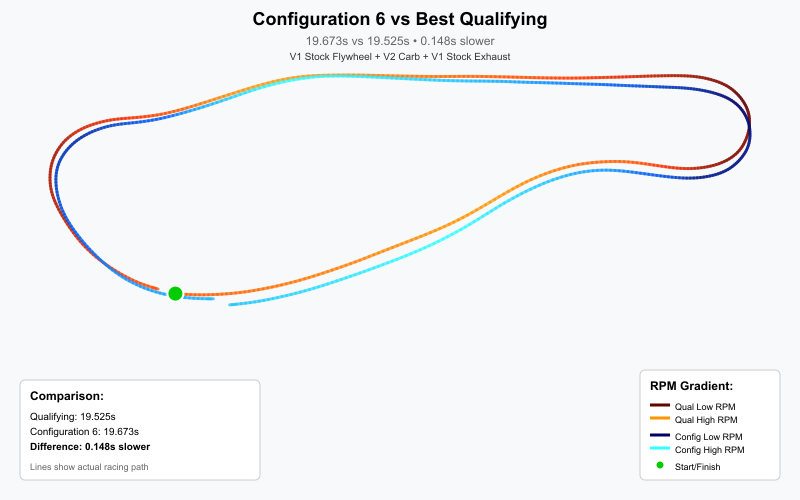
Configuration 6
🔧 Flywheel: V1 Stock
⚙️ Carburetor: V2
💨 Exhaust: V1 Stock
📅 Sessions: 10
RPM Maps - Config 1
↓ Press Down for Next Config
RPM Maps - Config 2
RPM Maps - Config 3
RPM Maps - Config 4 🏆
RPM Maps - Config 5
RPM Maps - Config 6
Config 1 vs Qualifying Overlay
↓ Press Down for Next Config
Config 2 vs Qualifying Overlay
Config 3 vs Qualifying Overlay
Config 4 vs Qualifying Overlay 🏆
Config 5 vs Qualifying Overlay
Config 6 vs Qualifying Overlay
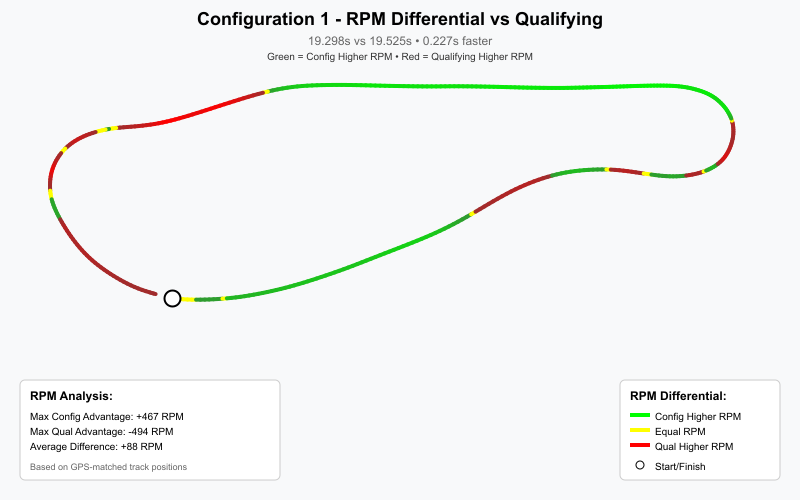
RPM Differential - Config 1
↓ Press Down for Next Config
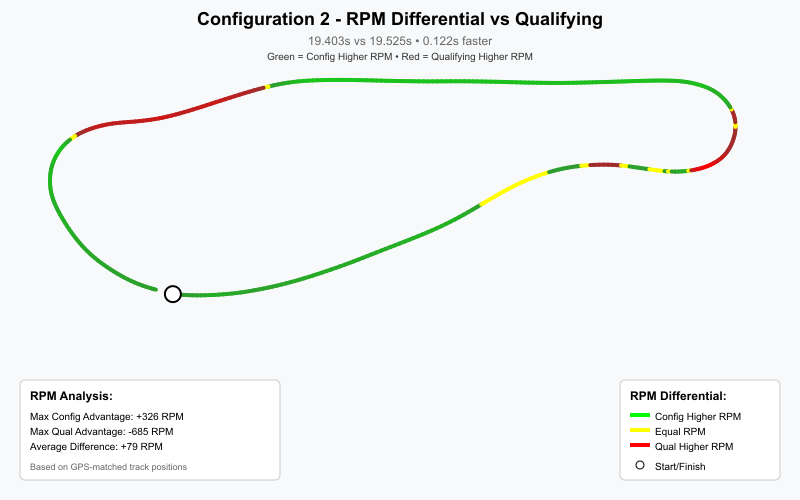
RPM Differential - Config 2
RPM Differential - Config 3
RPM Differential - Config 4 🏆
RPM Differential - Config 5
RPM Differential - Config 6
🎮 Interactive 3D Track Overlays
Explore interactive 3D visualizations:
🏁 Conclusions
Optimal Configuration
Configuration 4 delivered the best performance: 19.101s
Component Priority
- Flywheel - Largest performance impact
- Exhaust - Significant power delivery improvement
- Carburetor - Fine-tuning performance
Recommendation
Race with V2 Flywheel + V2 Carb + V2 Thick Wall Exhaust
Thank You!
2025-10-04 Test Day Analysis
MXK Karting | Performance Data Analysis