Programming in the Shell
Interacting wiht the Command Line Interface
Welcome everyone! This week’s session will prove a slight departure from R and introduce you to the Shell. 👩💻
You will learn what the Shell is, how you can interact with it and why you would choose to do so! Admittedly, most of the session will be dedicated to you getting it up and running on your local device.
Introduction to Programming with the Shell
So what exactly is the Shell? There are actually many different terms out there for roughly the same thing: shell, terminal, tty, command prompt, etc.. When we talk about either of these, we’re normally referring to the simple, text-based interface which is used to control a computer or a program. The correct term for this in the jargon is command line interface (CLI).
Why would you prefer running some of your code in the shell, rather than through RStudio or a similar IDE?
In his book “Effective Shell”, Dave Kerr argues that there are 3 main reasons:
- Using the shell can help you learn more about the internals of how your computer can work. This can be really helpful if you are technology professional or work with computers.
- There are some scenarios where you have to use a shell. Not every program or system can be operated with a Graphical User Interface, which is the visual point-and-click interface you are probably using now. Some lower-level programs do not have such interfaces, and many computers do not either (here he is talking specifically about so-called “super-computers”.)
- There are some scenarios where it can be more efficient to use the shell. Operations which might be time consuming or repetitive to perform using the user interface might be much faster to perform in a shell. You can also write shell scripts to automate these kinds of operations.
Setup 😵
Here is how you can get the shell to run smoothly on your local device:
on MacOS
Extremely straightforward:
1. Open Spotlight and type in “Terminal”
knitr::include_graphics("pics/terminal_spotlight.png")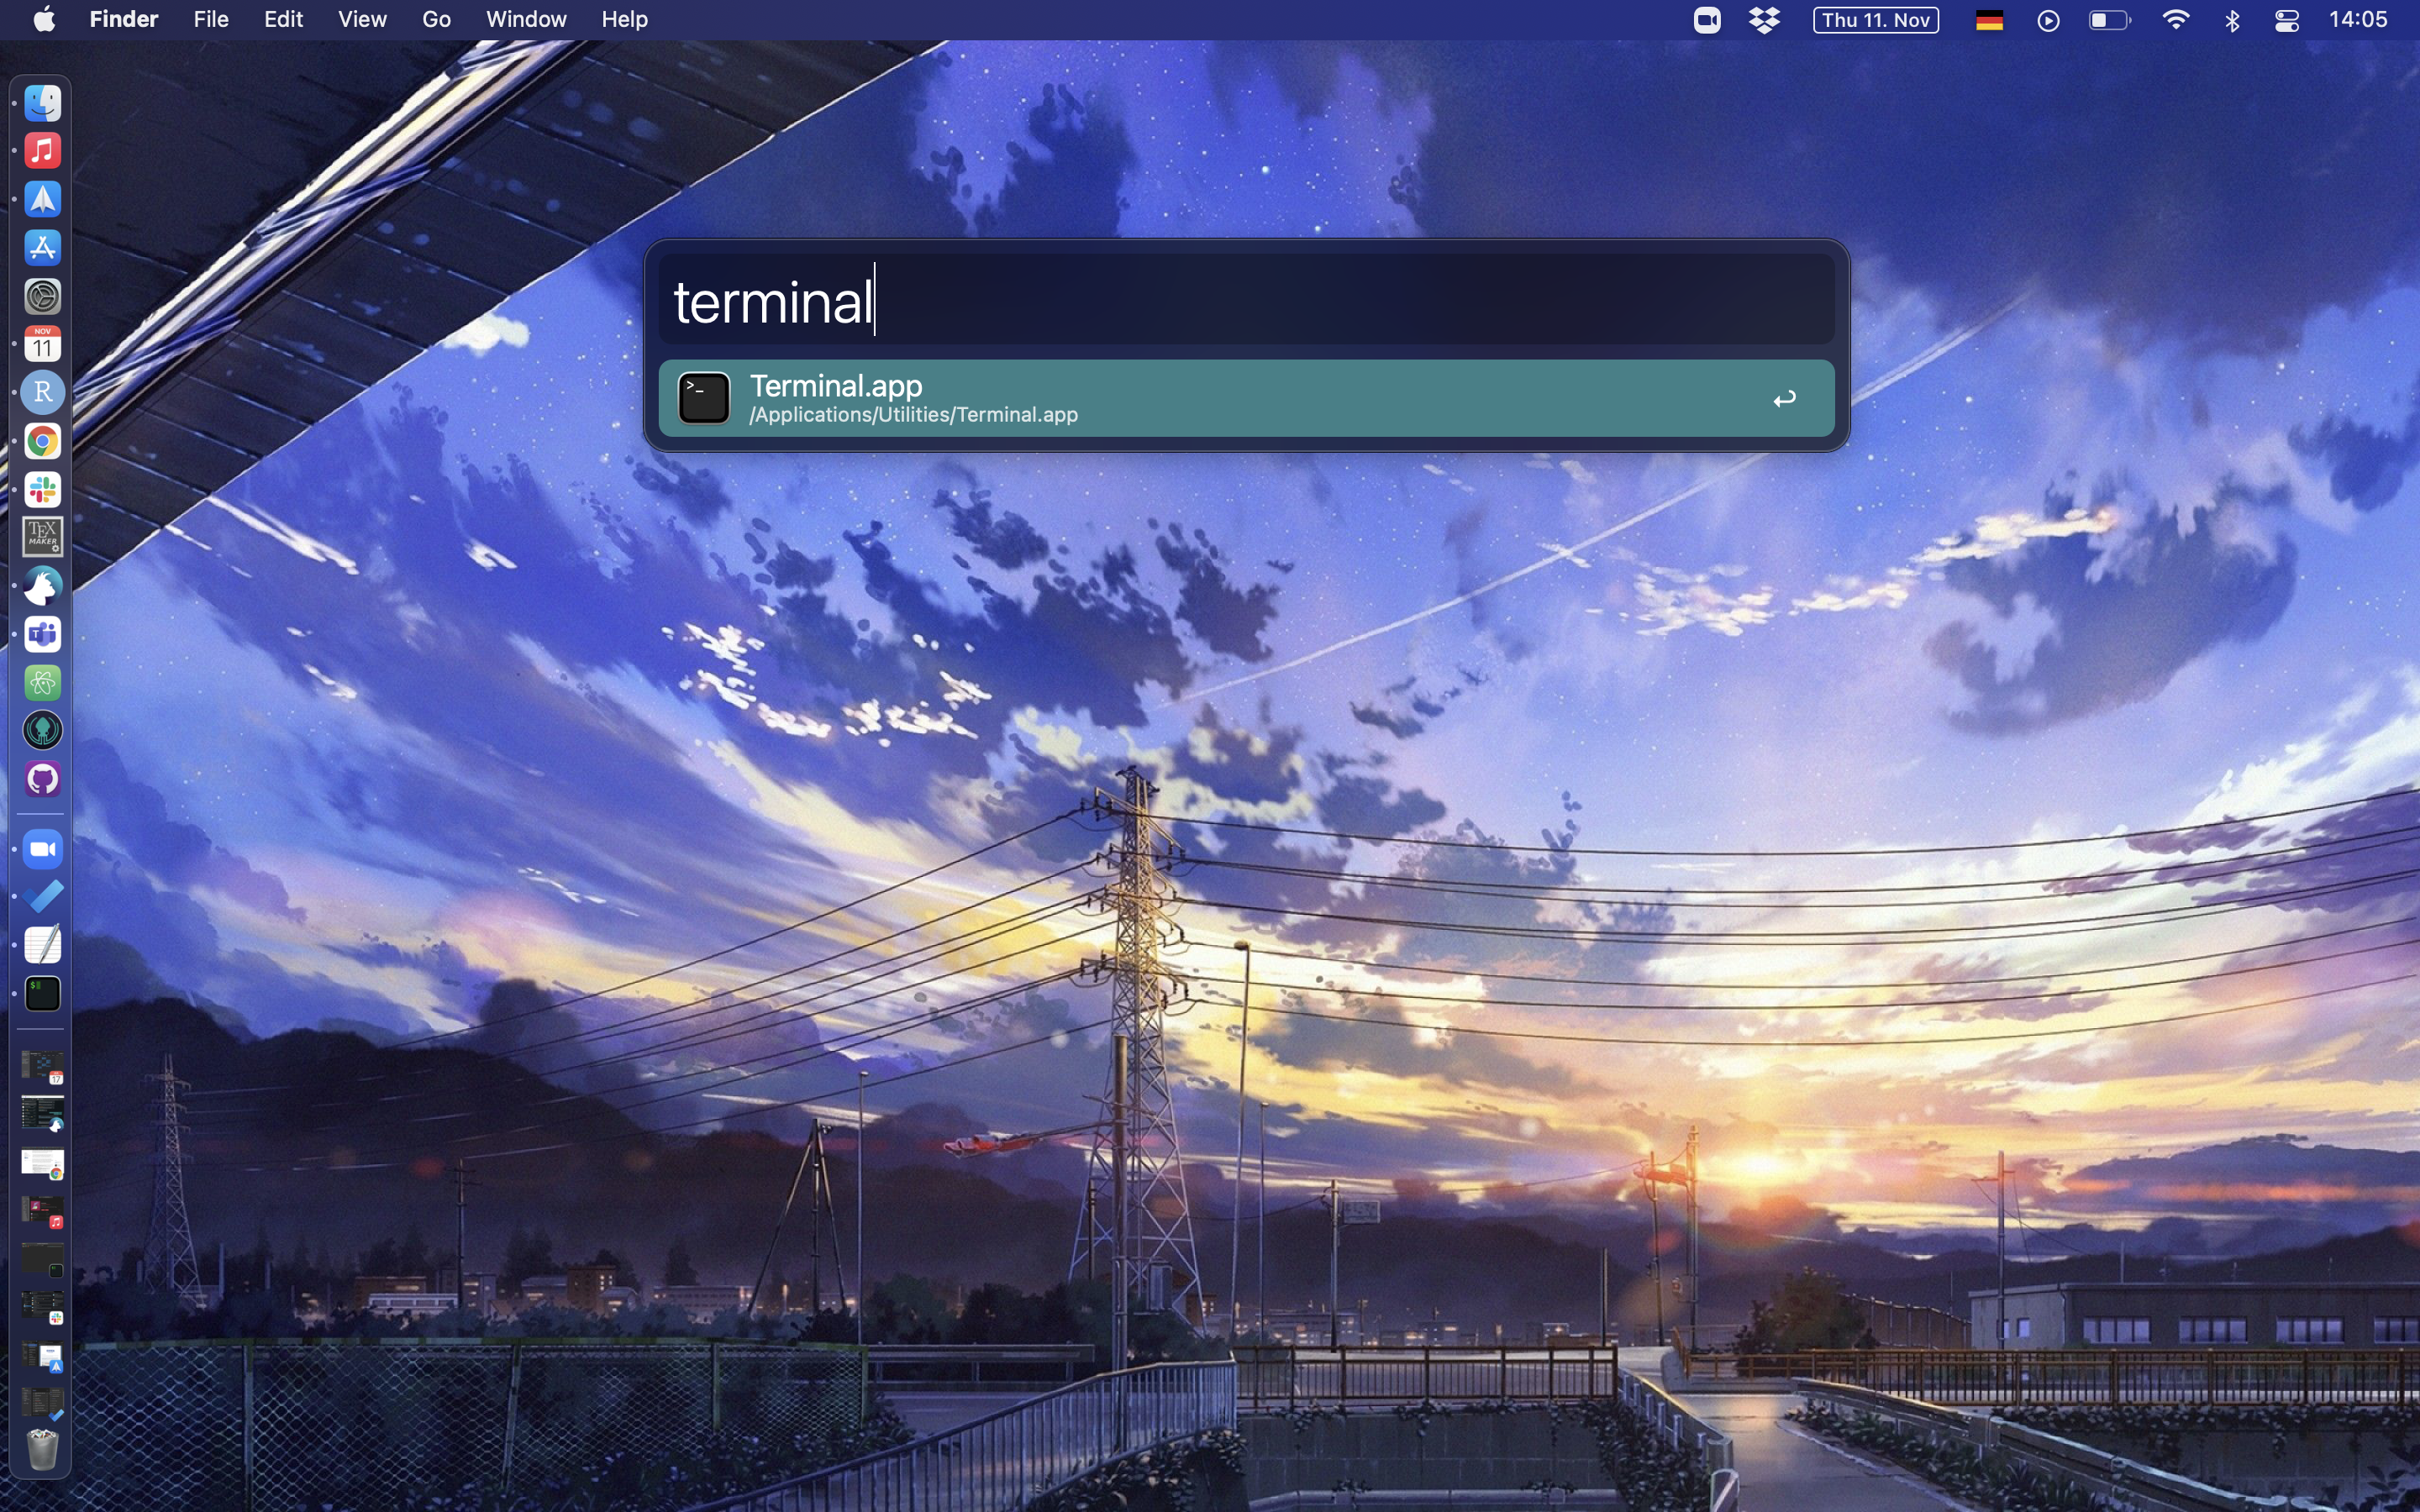
For the record, I use “iTerm2” which you can download here. It has a few small tweaks that makes it more attractive than the base terminal.
2. Run Terminal
knitr::include_graphics("pics/iTerm_open.png")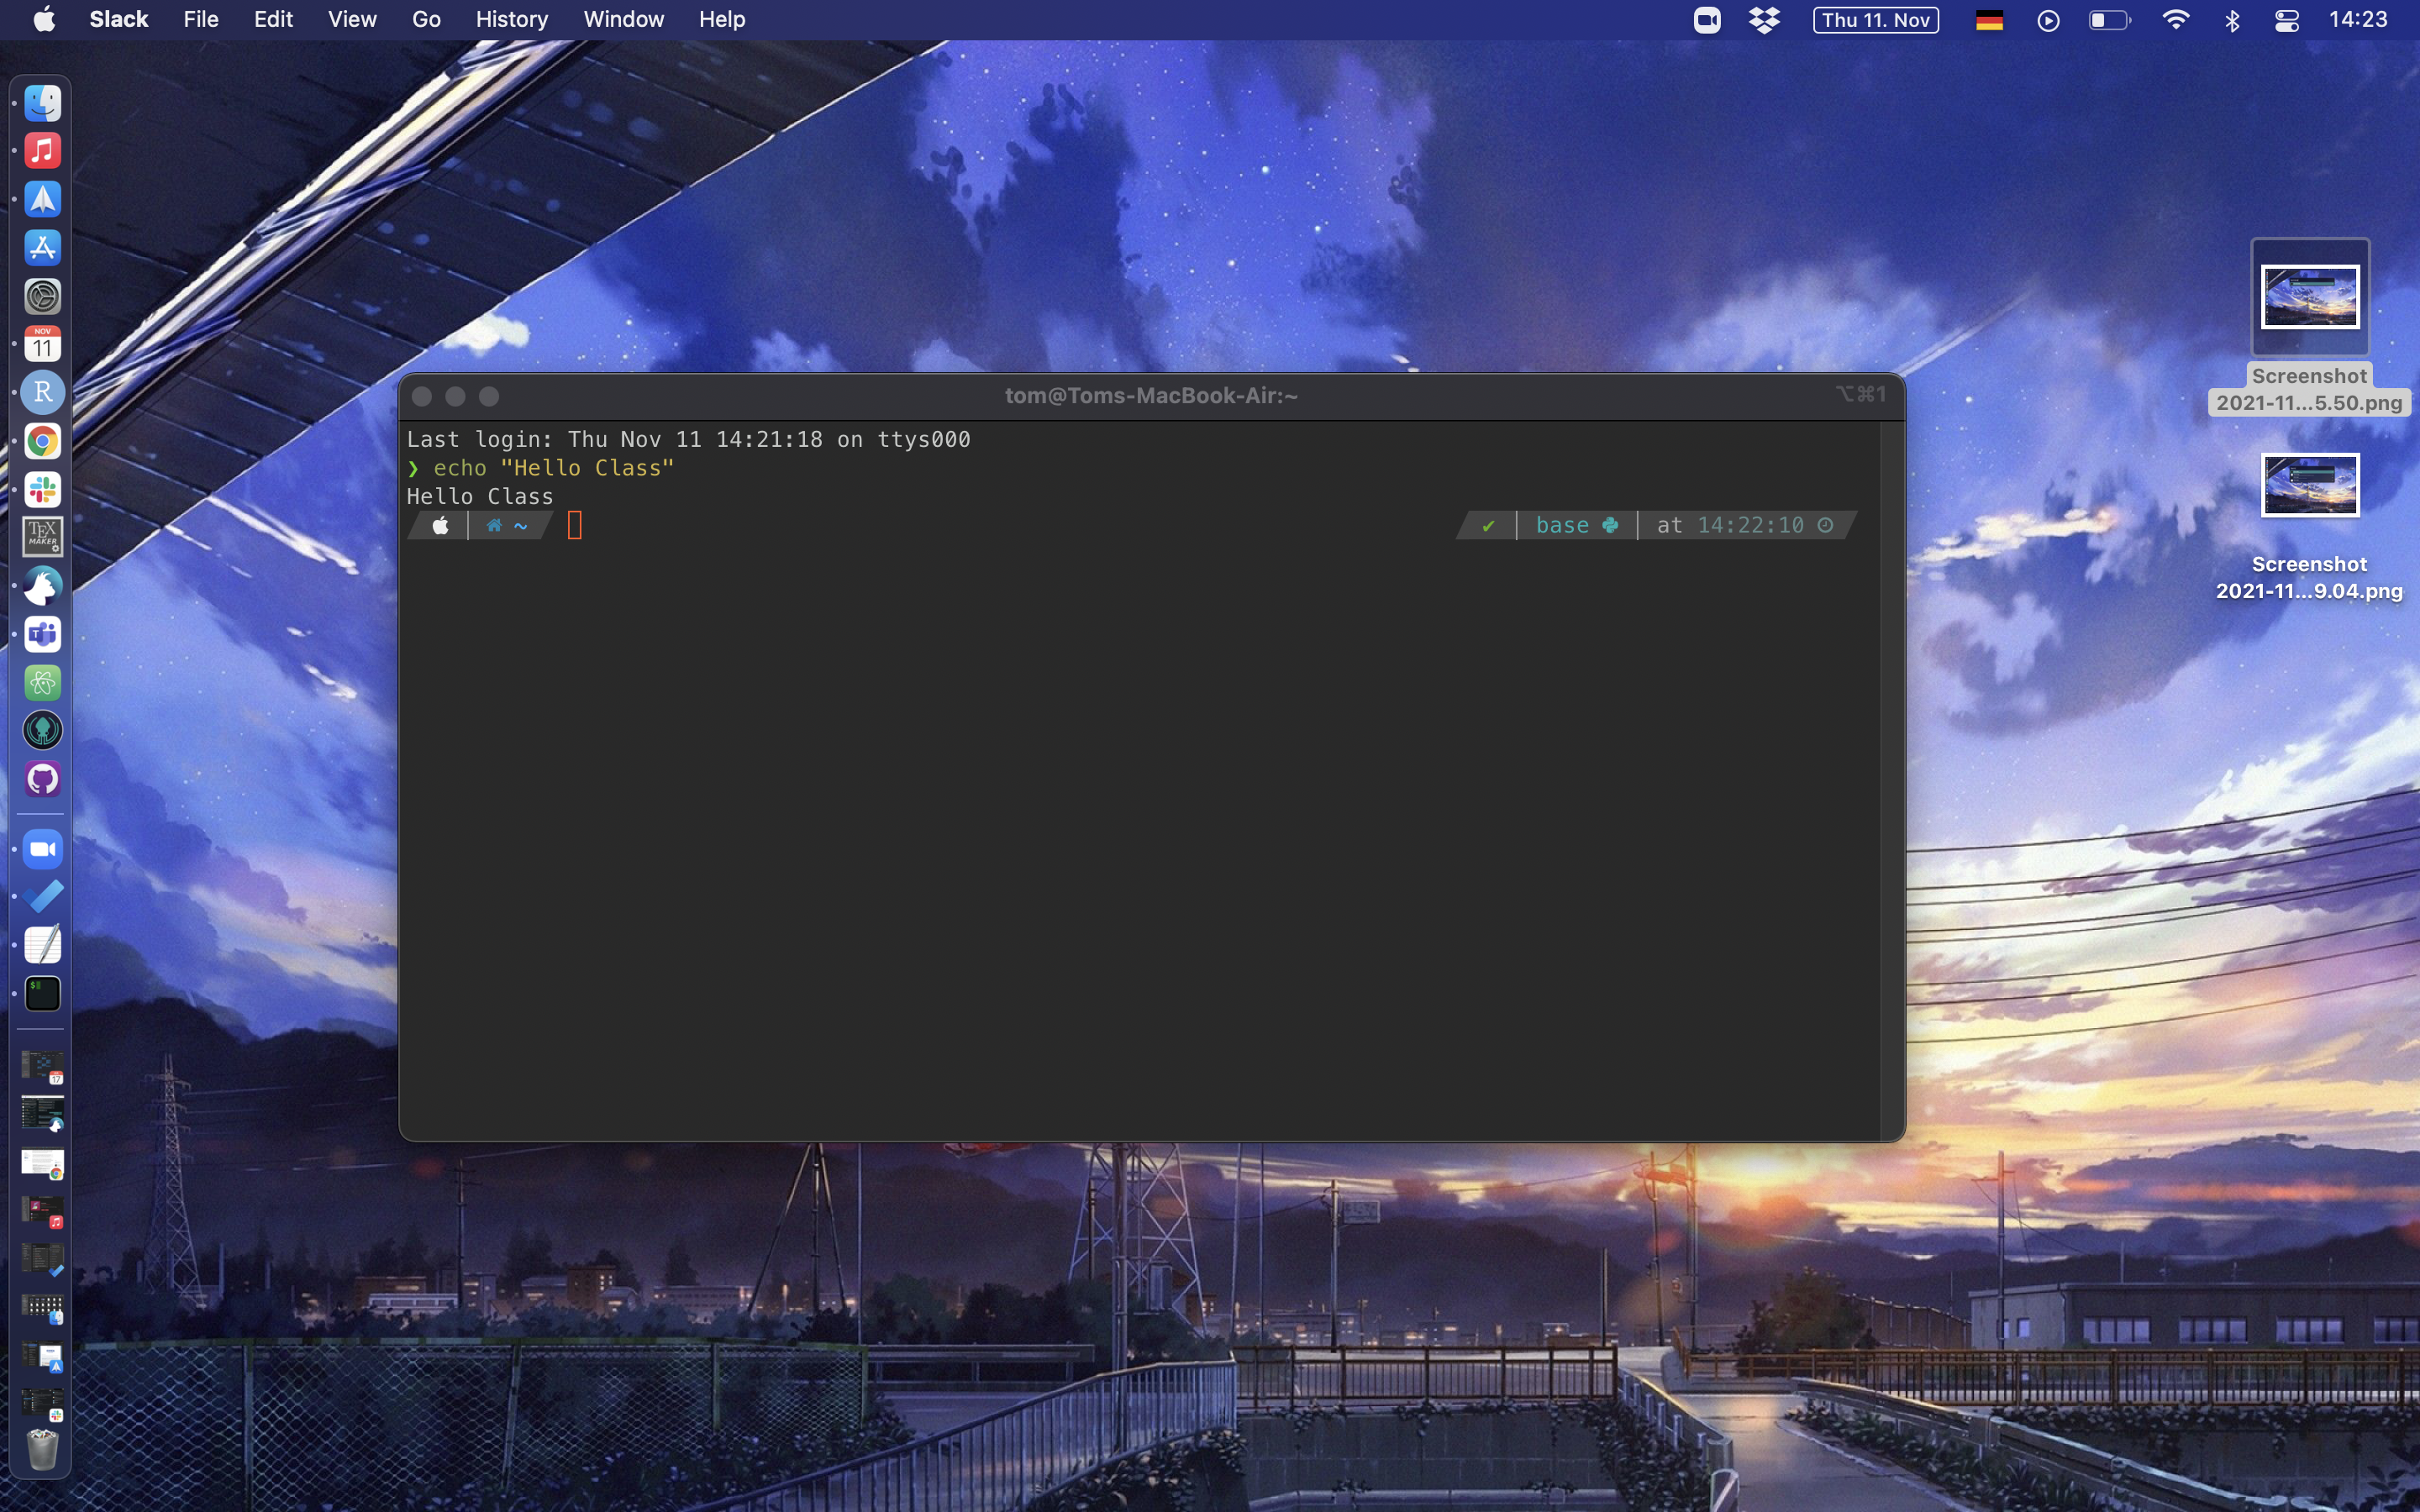
Even if you downloaded “iTerm”, yours will look different. That is because you can customise it quite extensively.
You are now essentially ready to interact with the Shell. Easy, no?
Windows
This is where things can get a little tricky. There are a number of shell programs on Microsoft Windows. We’ll be using the basic shell which is pre-installed, which is called the “Command Prompt”.
To open the command prompt, start by clicking the start button on the bottom left hand side of the screen, and type command prompt. Open the Command Prompt program:
knitr::include_graphics("pics/windows-search-command-prompt.png")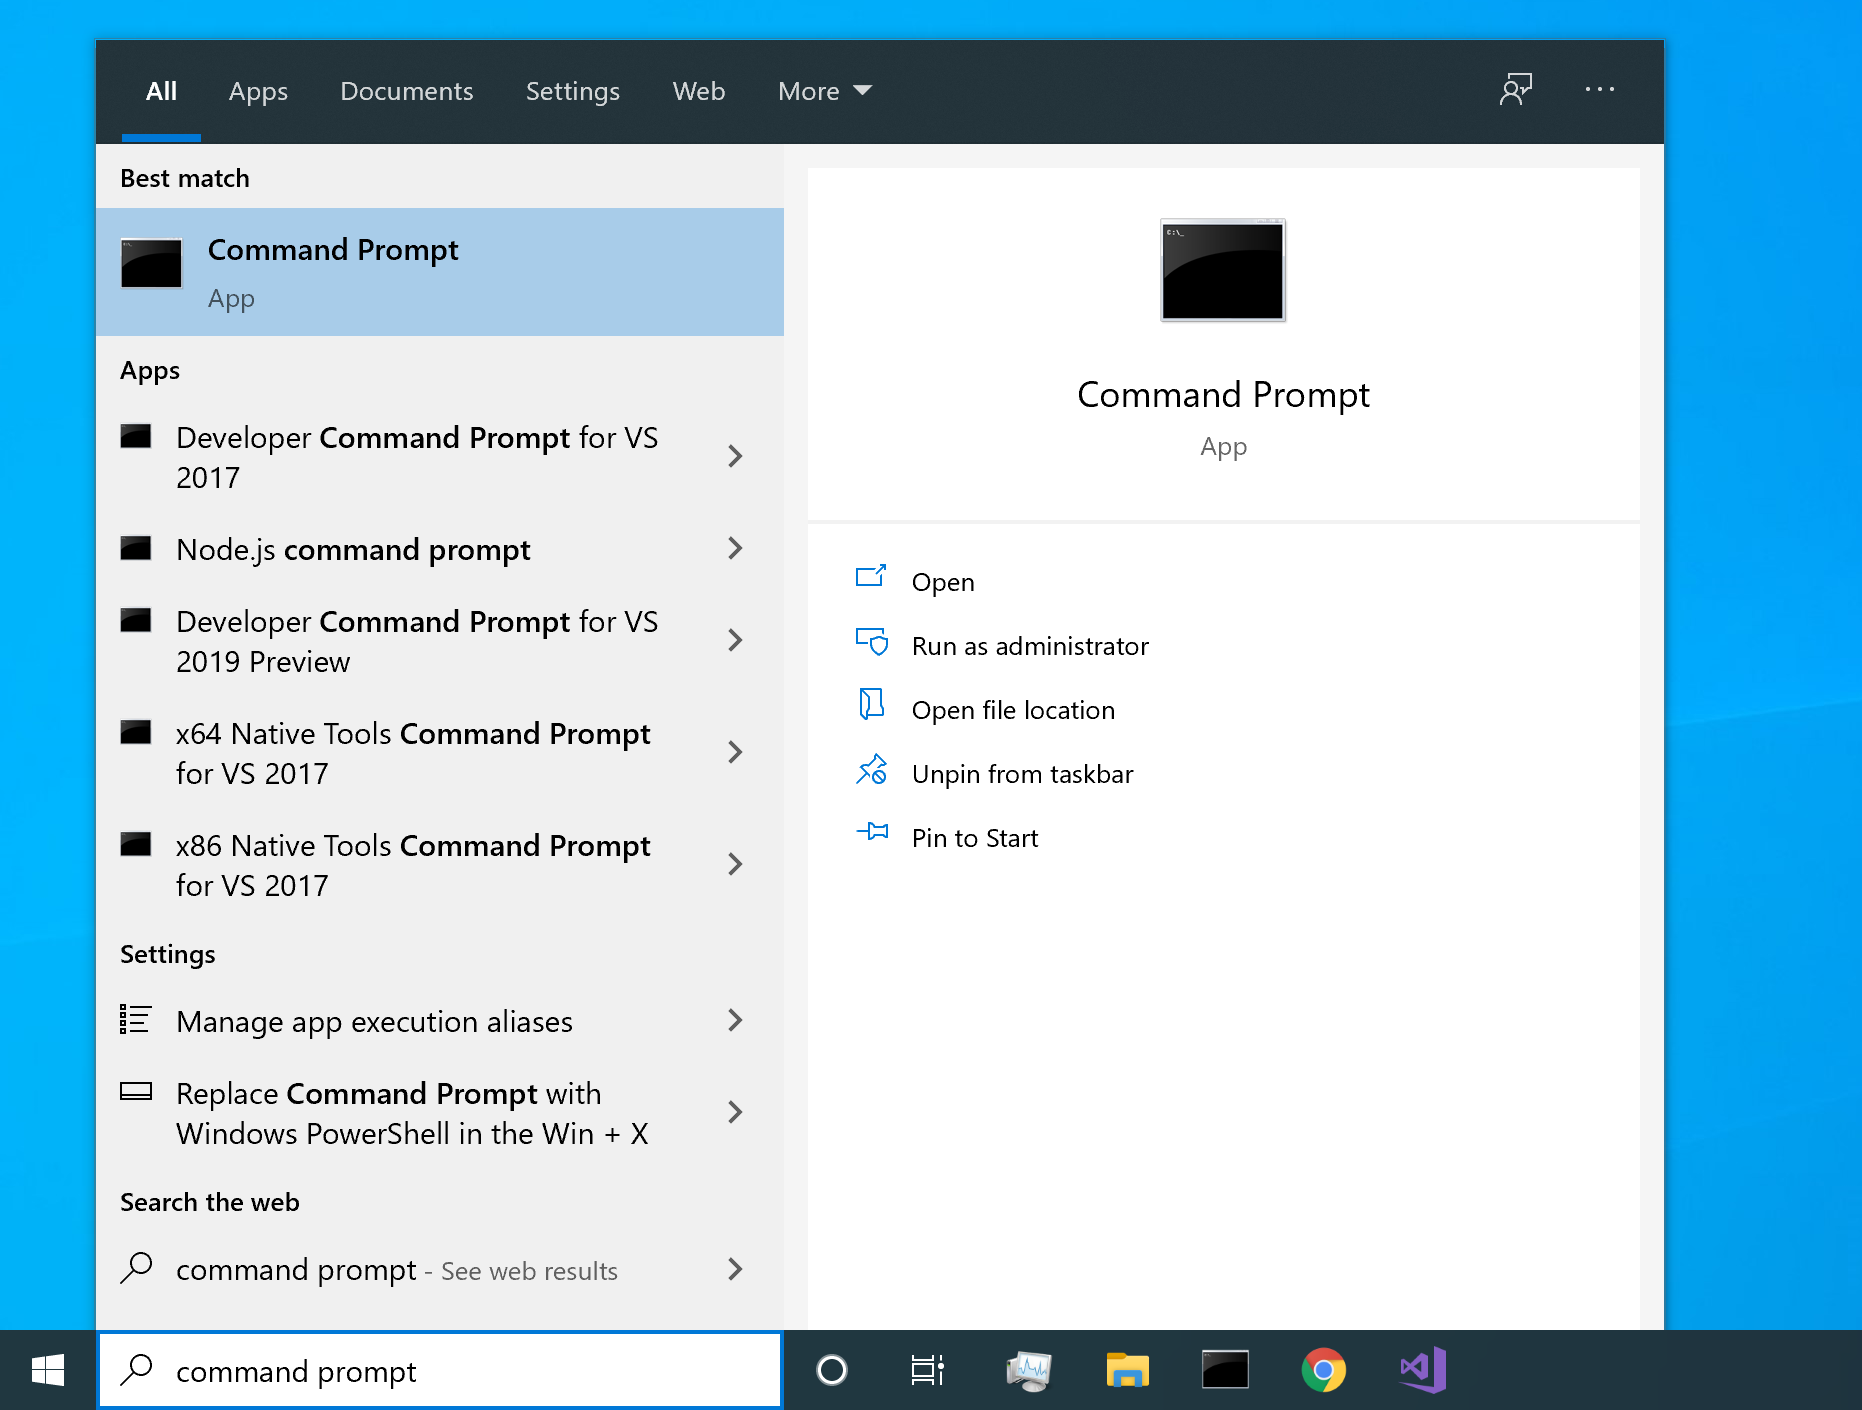
Once the program has opened, type whoami then hit the Return key. The whoami program will show the username of the logged in user:
knitr::include_graphics("pics/windows-shell-whoami.png")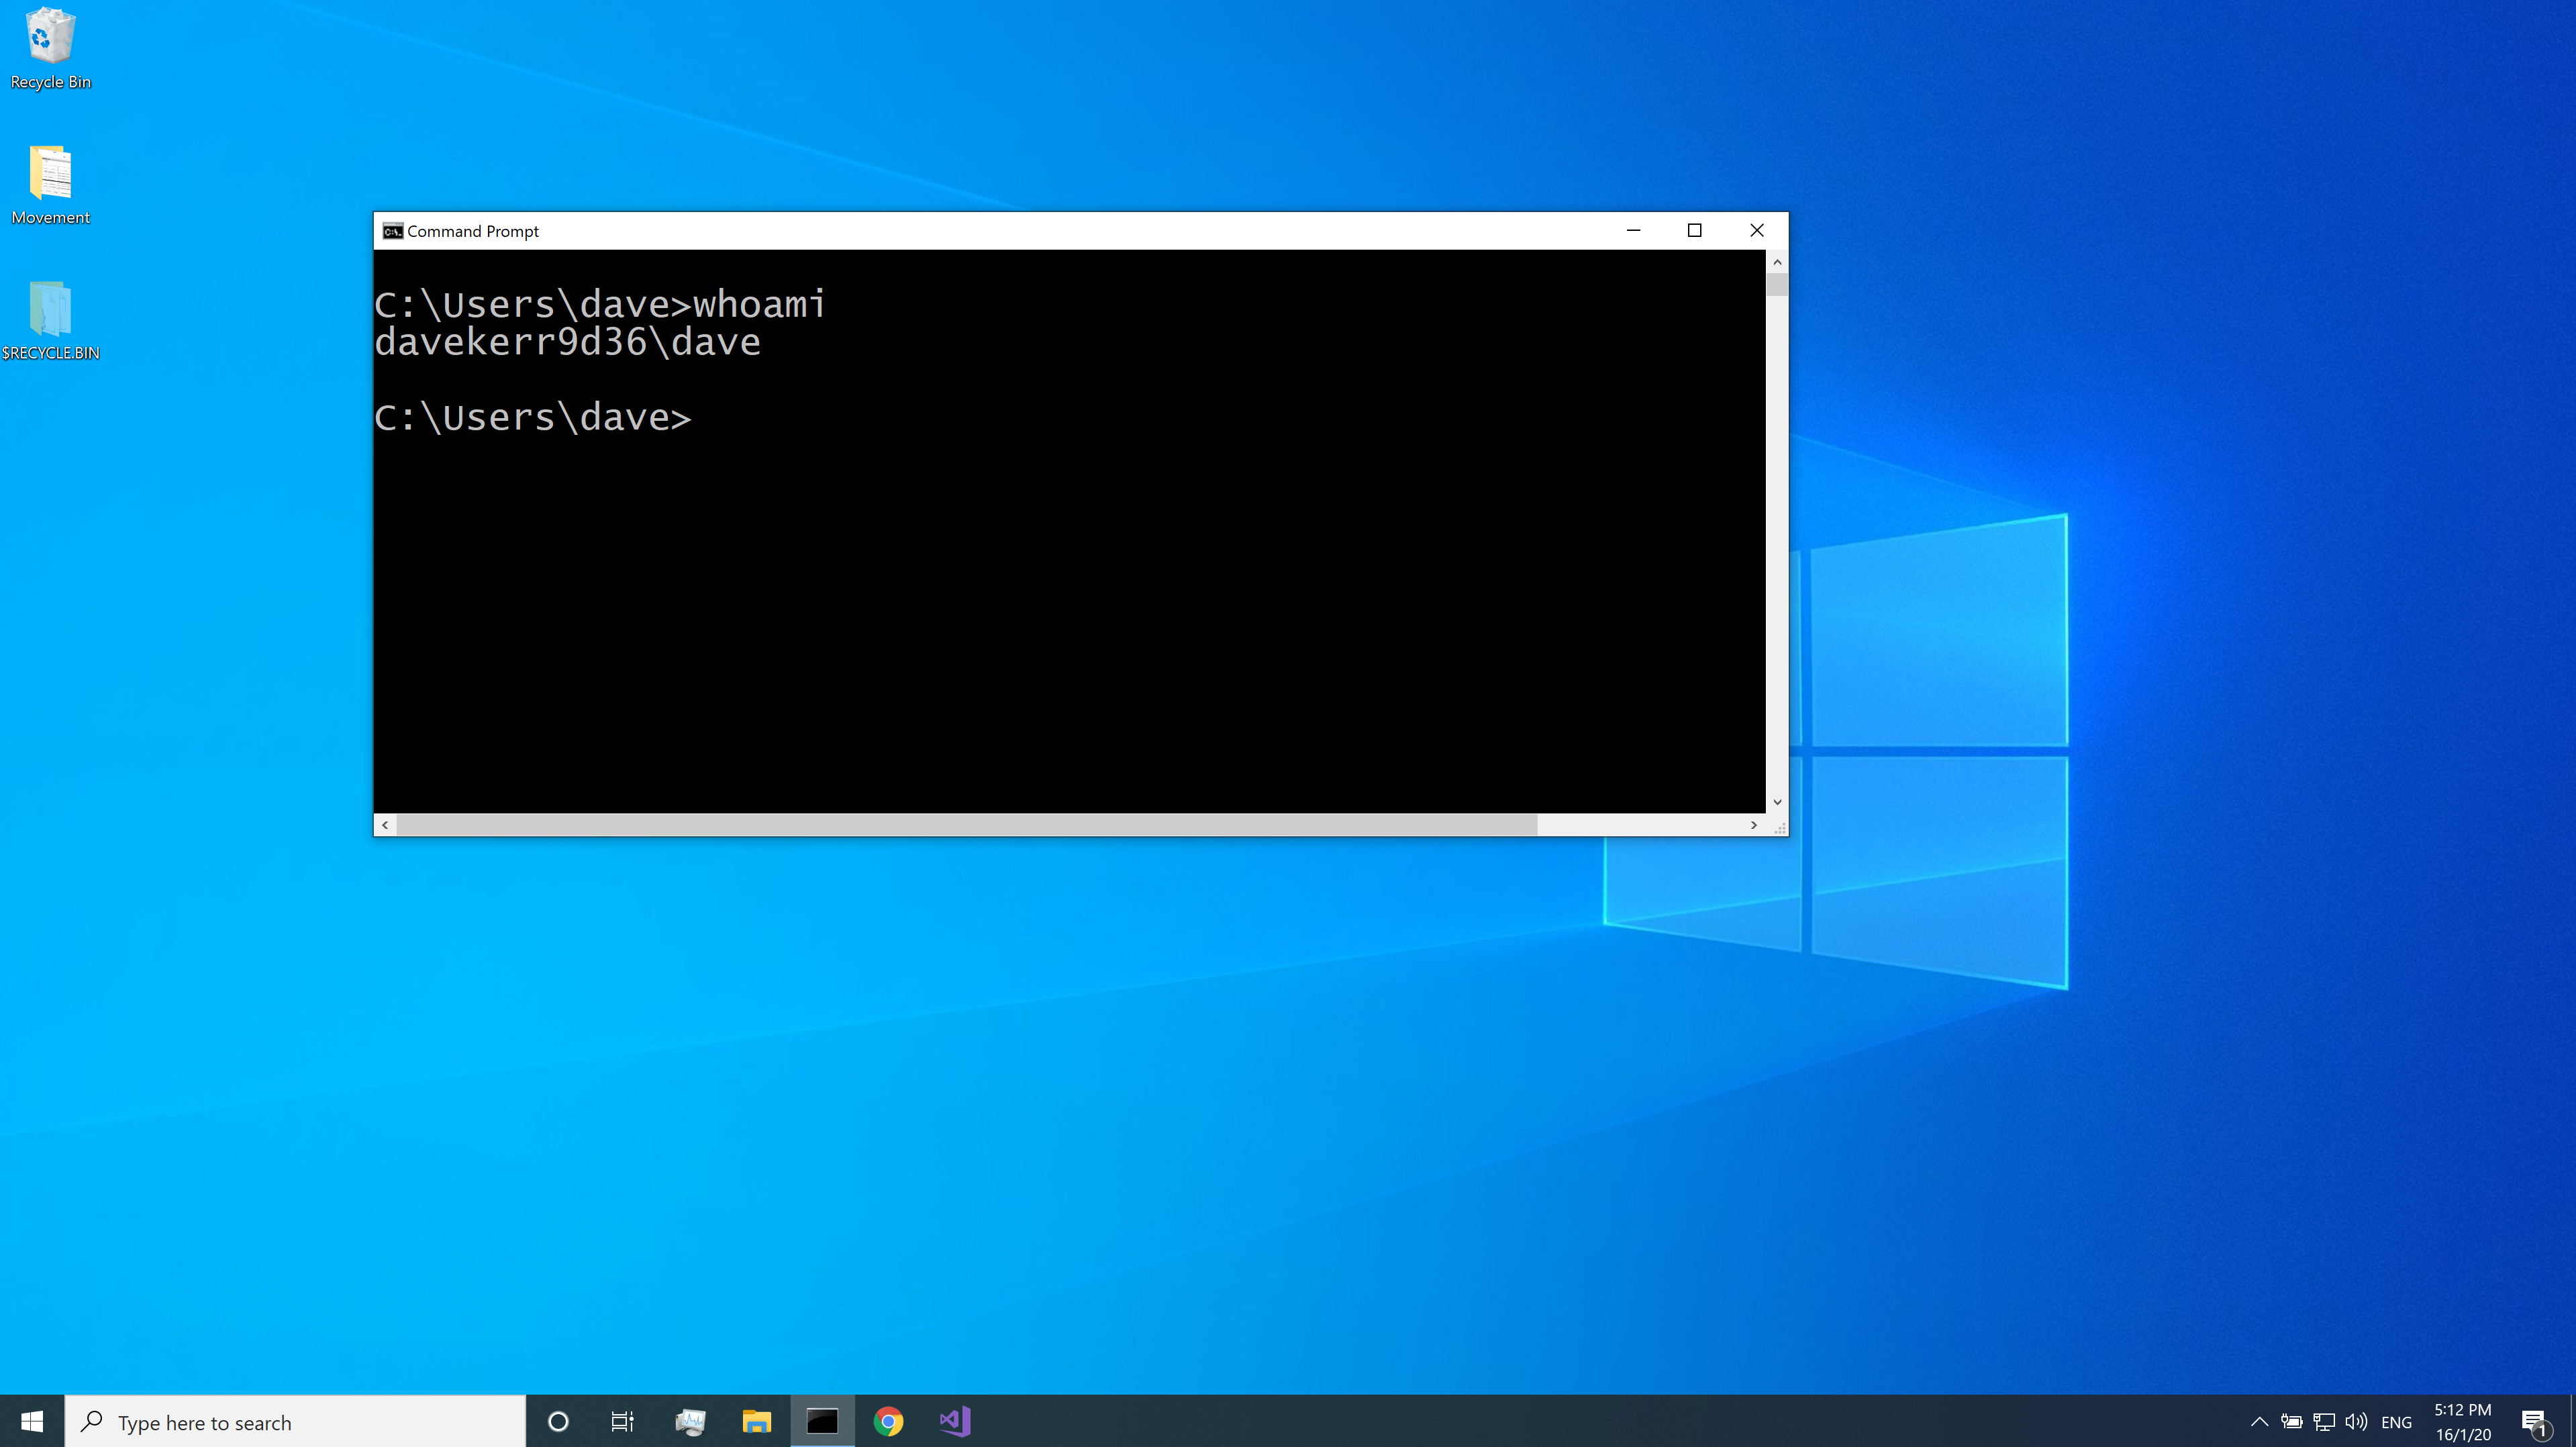
Unfortunately, it is not all that easy. The CLI in Windows does not behave the way a “Linux-like” shell would. In order to get it running the same way you have essentially 2 choices:
Disclaimer!
I do not have access to a Windows machine. As a result I had to rely on what other people suggest Windows Users do. I will try and help as much as possible, but am bound by my own limited experience with this stuff on Windows.
1 Configuring the Shell
Dave Kerr recommends to install “Linux Tools”.
This is probably the easiest option. It will let you run something like a Linux shell when you choose to, but not get in your way during day-to-day usage of your computer.
To get a Linux-like experience on a Windows machine, you can install “Cygwin”. Cygwin provides a large set of programs which are generally available on Linux systems, which are designed to work on Windows.
For more details on how to install “Cygwin” and whow to use it see here.
2 Install Windows Subsystem for Linux (WSL)
Grant McDermott on the other hand recommends that you setup the Windows Subsystem for Linux (WSL). Again this must be installed first and a big downside is that it is only available to Windows 10 and 11 users.
The basic installation guid can be found here.
Now you can access WSL through RStudio by making WSL your default RStudio Terminal:
- In RStudio, navigate to: Tools > Terminal > Terminal Options….
knitr::include_graphics("pics/wsl-rstudio-1.png")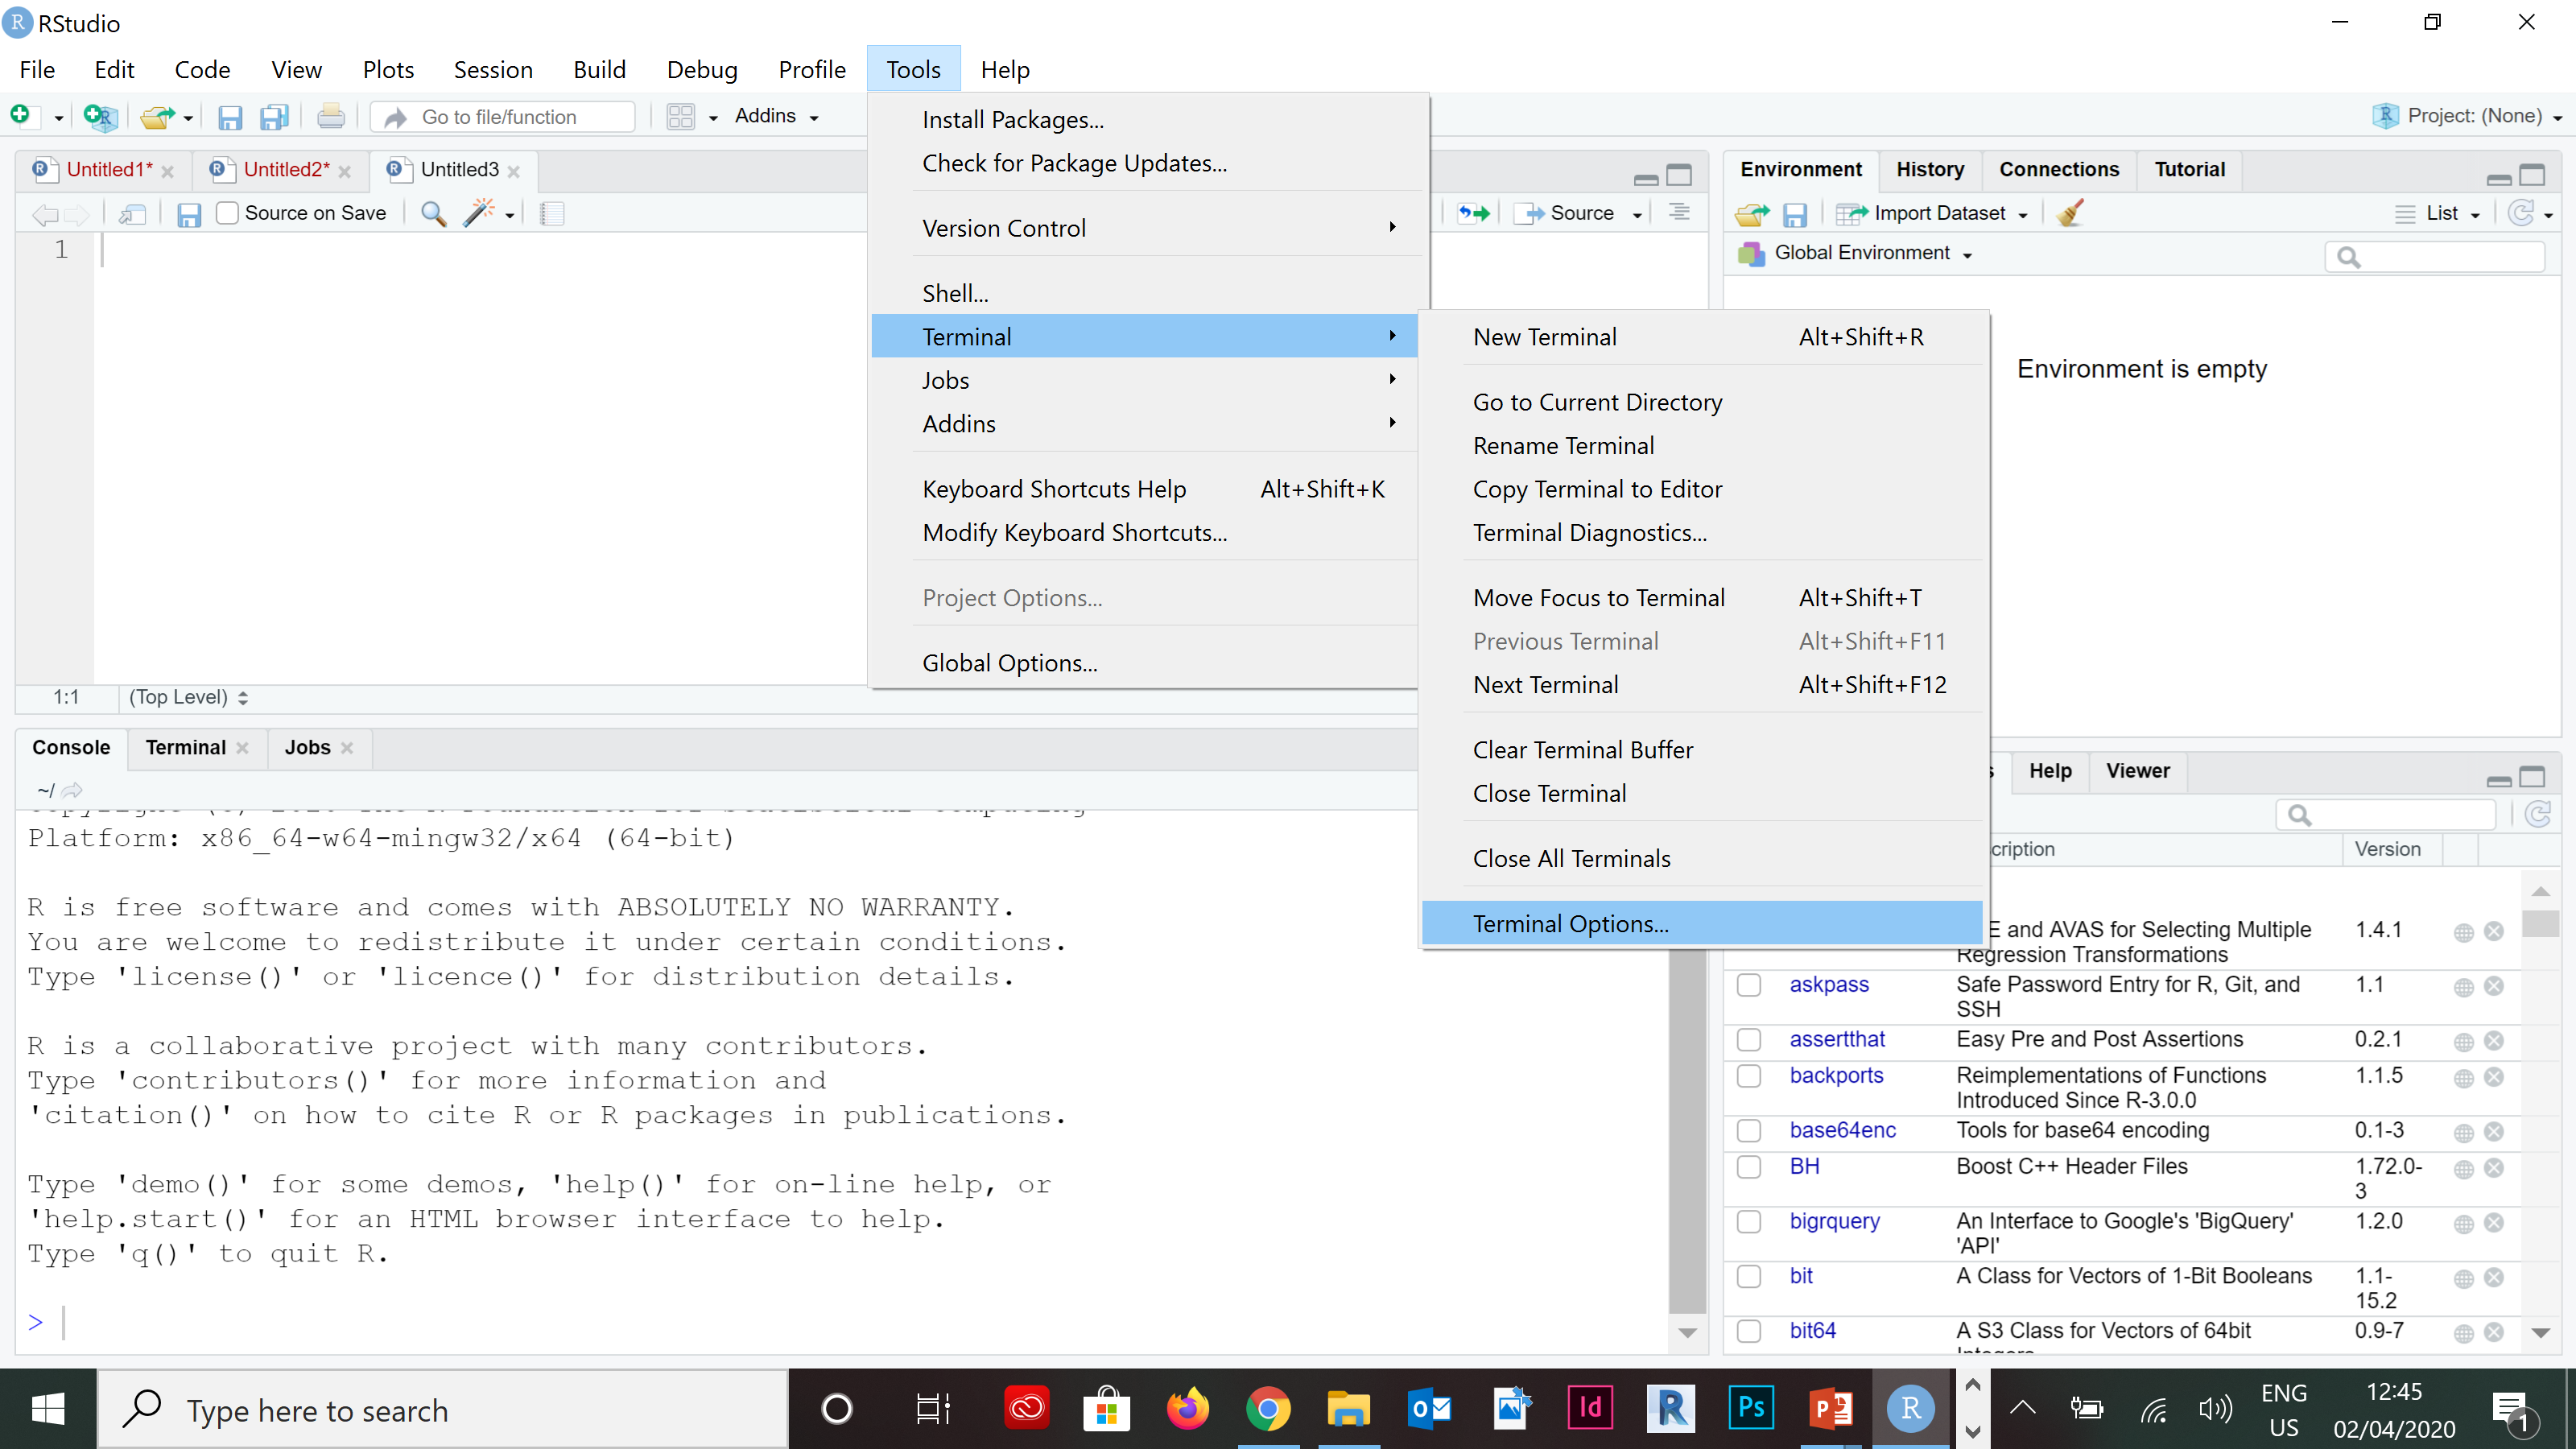
- Click on the dropdown menu for New terminals open with and select “Bash (Windows Subsystem for Linux)”, Then click OK.
knitr::include_graphics("pics/wsl-rstudio-2.png")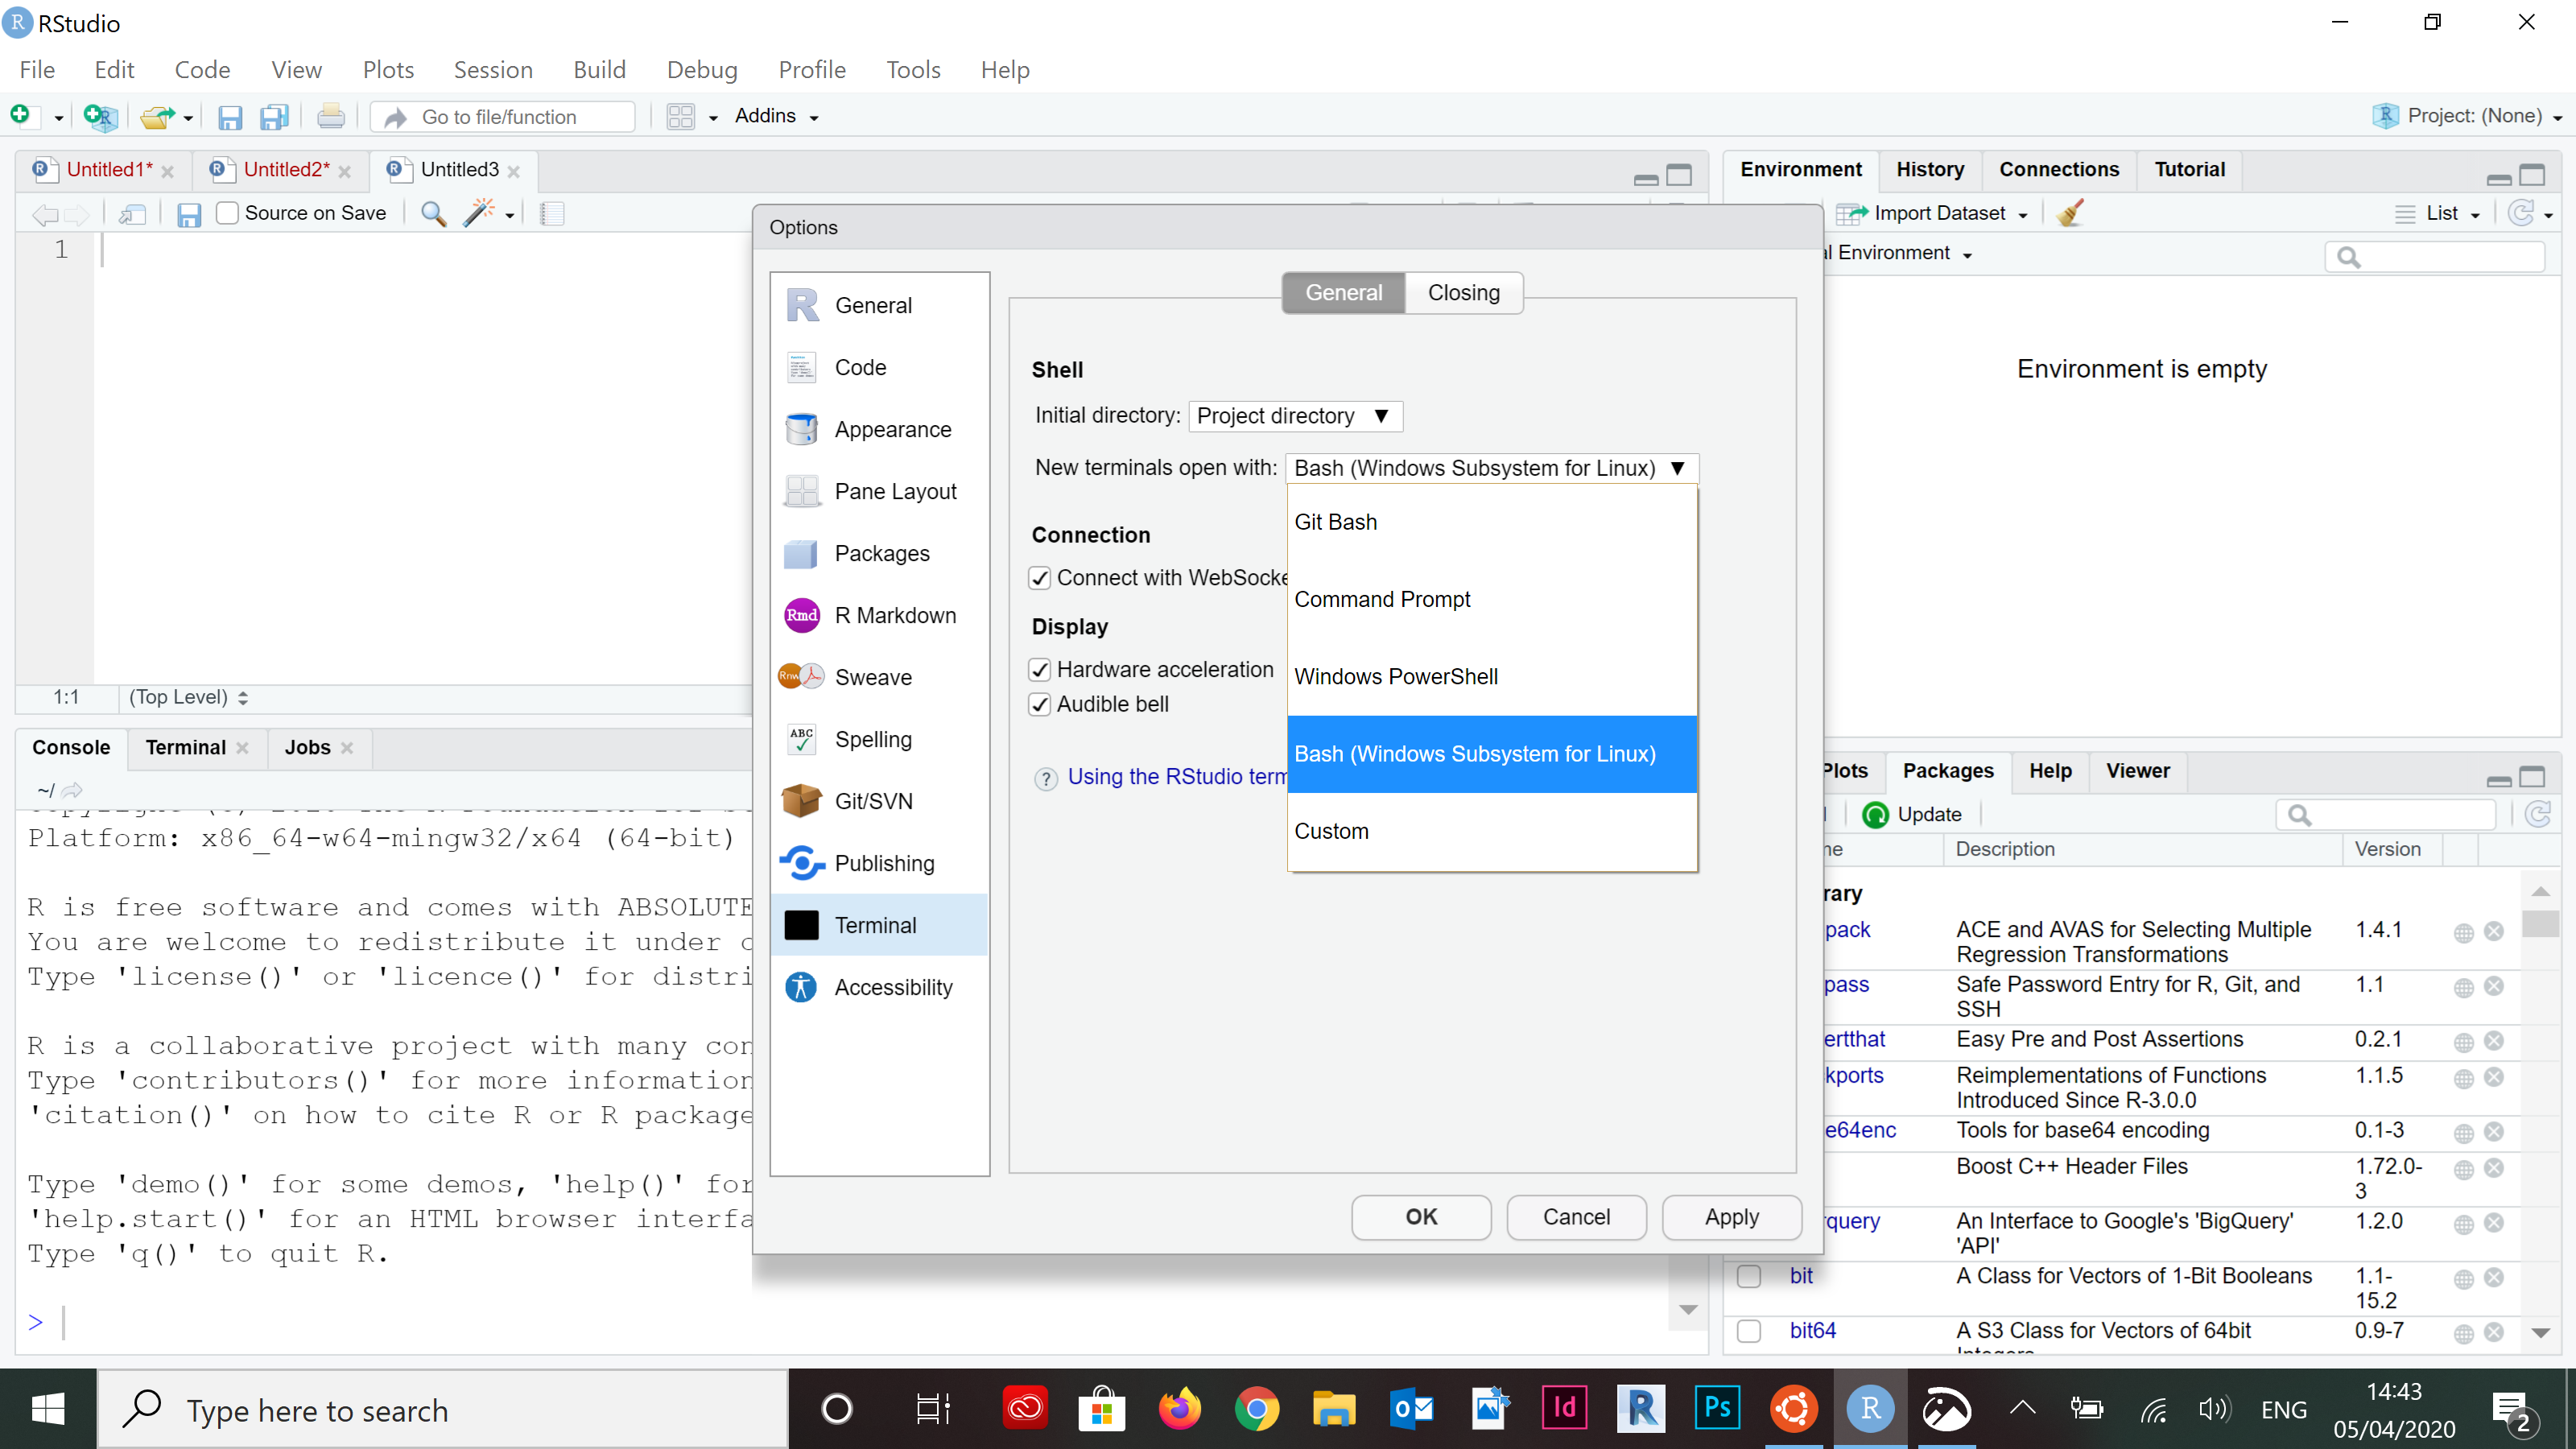
- Refresh your RStudio terminal (Alt+Shift+R).
- You should see the WSL Bash environment with the path automatically configured to the present working director, mount point and all.
knitr::include_graphics("pics/wsl-rstudio-4.png")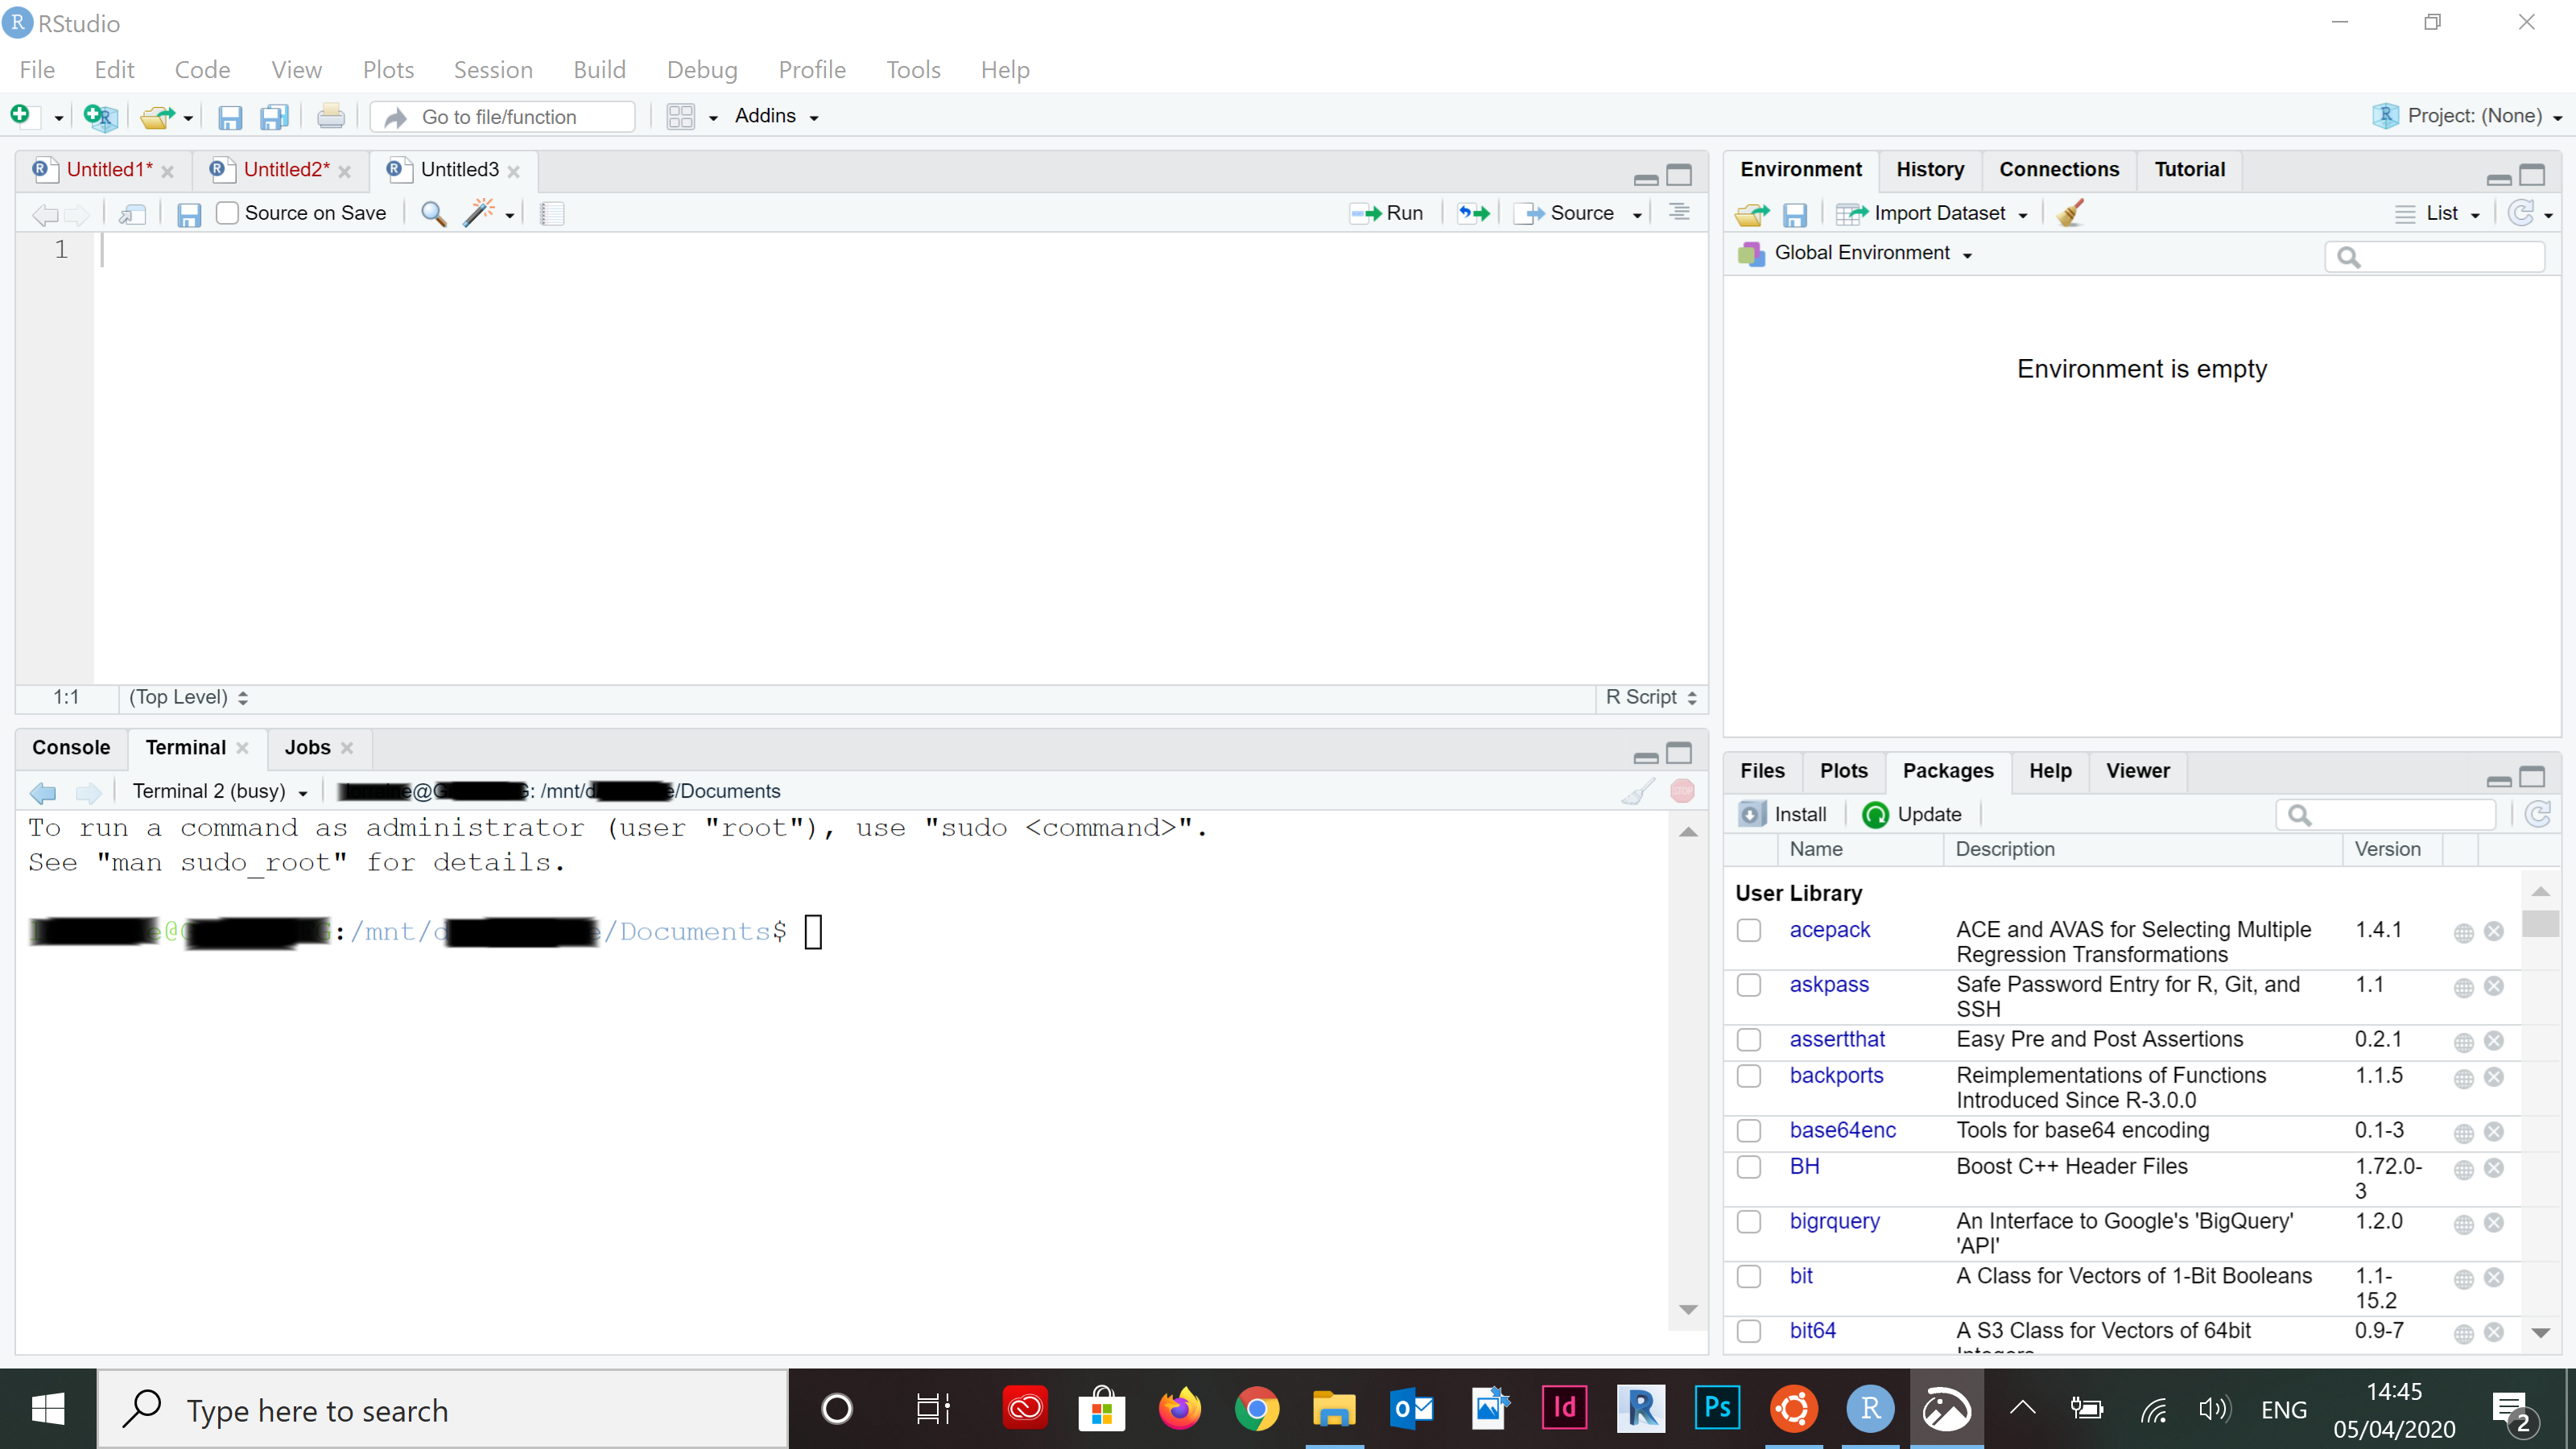
##{-}
Automating certain tasks 🧙
The Shell can be a great option if you are trying to automate certain tasks.
For example you might want to run several R-scripts in a row and return their output. Rather than use source() within RStudio you can quickly do this in the Shell:
#!/bin/sh

Rscript 00_download-Data.R
Rscript 01_filter-reorder-plot.R
Rscript 02_aggregate-plot.R
#!/bin/sh just indicates that the following files should be executed (i.e. run) in the shell.
But rather than run it all in R there might be a tool out there that is better suited to the task, or just saves you from having to create an additional R-script? Often, you will employ a variety of tools to arrive at the desired result. Combining these tools will only be possible throught the shell.
#!/bin/sh

curl -L http://bit.ly/lotr_raw-tsv >lotr_raw.tsv
Rscript 01_filter-reorder-plot.R
Rscript 02_aggregate-plot.R
Note curl is a way to transfer data through the CLI. No need to write a script.
If you want to get really fancy, have a look at Makefiles. They are a way to build an executable file from your scripts, following a certain logic. A great and illustrative example on how to use them to compile academic papers can be found here.
Say you would like to scrape a set of newspaper articles each week. Repeatedly, setting aside an afternoon for this is both unproductive and unnecessary. You can use the shell to automate and schedule the scraper. It is a bit complicated but here you can find a guide for Windows and for MacOS.
Sources
This tutorial is based largely on lecture 3 from Grant McDermott’s course Data Science for Economists and draws on Dave Kerr’s Effective Shell.
The examples for the filesystem navigation are inspired by the lesson in Software Carpentry and the automation stuff is taken from here.
A work by Lisa Oswald & Tom Arend
Prepared for Intro to Data Science, taught by Simon Munzert