Get Started with Git &

Adapted from Happy Git and GitHub for the useR

Jadey Ryan

2024-06-20

Ch 1: Why Git? Why GitHub?

  • Git: free & open source version control system.

    • Like “Track Changes” in MS Word, but for all files in the project folder.
  • GitHub: hosting service/platform for Git-based projects on the internet (aka RStudio projects in our case).

    • Like Sharepoint, allows collaboration.
  • For software developers, researchers, government agencies, your future self, and anyone who needs a robust version control system and collaboration!

  • Git & GitHub are not the same thing, like R & RStudio are not the same thing.

Ch 6: Install Git

  1. Install Git from https://git-scm.com/install.

  2. Close and re-open RStudio.

  3. Check that it’s installed in the Terminal in RStudio by running:

Terminal
git --version

Note

You should see something like: git version 2.37.1.windows.1

If you see something like git: command not found, Git was not successfully installed.

See https://happygitwithr.com/install-git#install-git for more help.

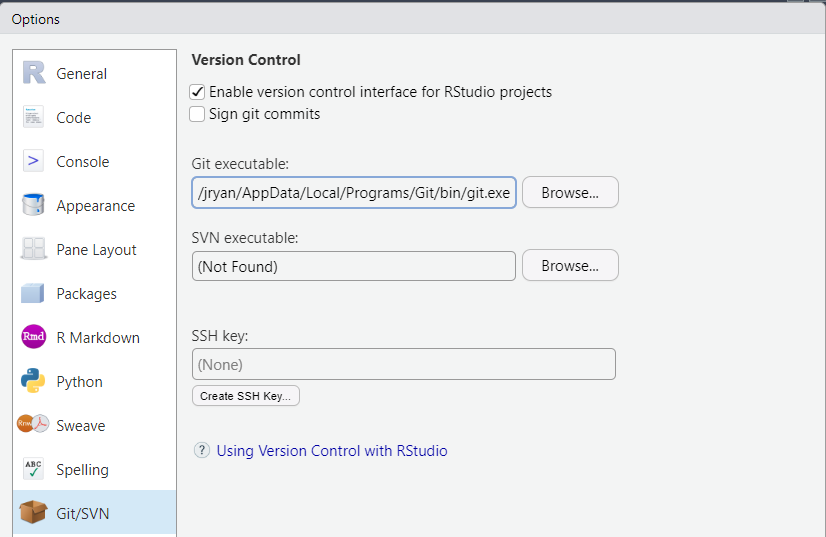
  1. Check if the Git executable path is found in Tools > Global Options > Git/SVN.

Ch 7: Introduce yourself to Git

Use the email associated with your GitHub account.

Console
## install if needed (do this exactly once):
## install.packages("usethis")

library(usethis)
use_git_config(user.name = "Jane Doe", user.email = "jane@example.org")
Terminal
git config --global user.name "Jane Doe"
git config --global user.email "jane@example.com"
git config --global --list

macOS users

If you get an error, try installing XCode command line tools by following these instructions: https://happygitwithr.com/install-git#macos.

Restart RStudio and try again.

Ch 9: Personal access tokens for HTTPS

  1. Generate token from https://github.com/settings/tokens or:

    usethis::create_github_token(description = "work-laptop")
  2. Select expiration period, ensure selected scopes include “repo”, “user”, “workflow”, then click “Generate token”.

  3. Copy the token and save it somewhere safe. Treat it like a password.

  4. Securely store it in RStudio with the gitcreds package.

    Run this in the console

    gitcreds::gitcreds_set()

    to get this prompt for your token (not your login password):

    ? Enter password or token:     ghp_xxxxxxxxxxxxxxxxxxxxxxxxxxxxxxxxxxxx
    -> Adding new credentials...
    -> Removing credentials from cache...
    -> Done.

Ch 11 & 12: Connect Git, GitHub, RStudio

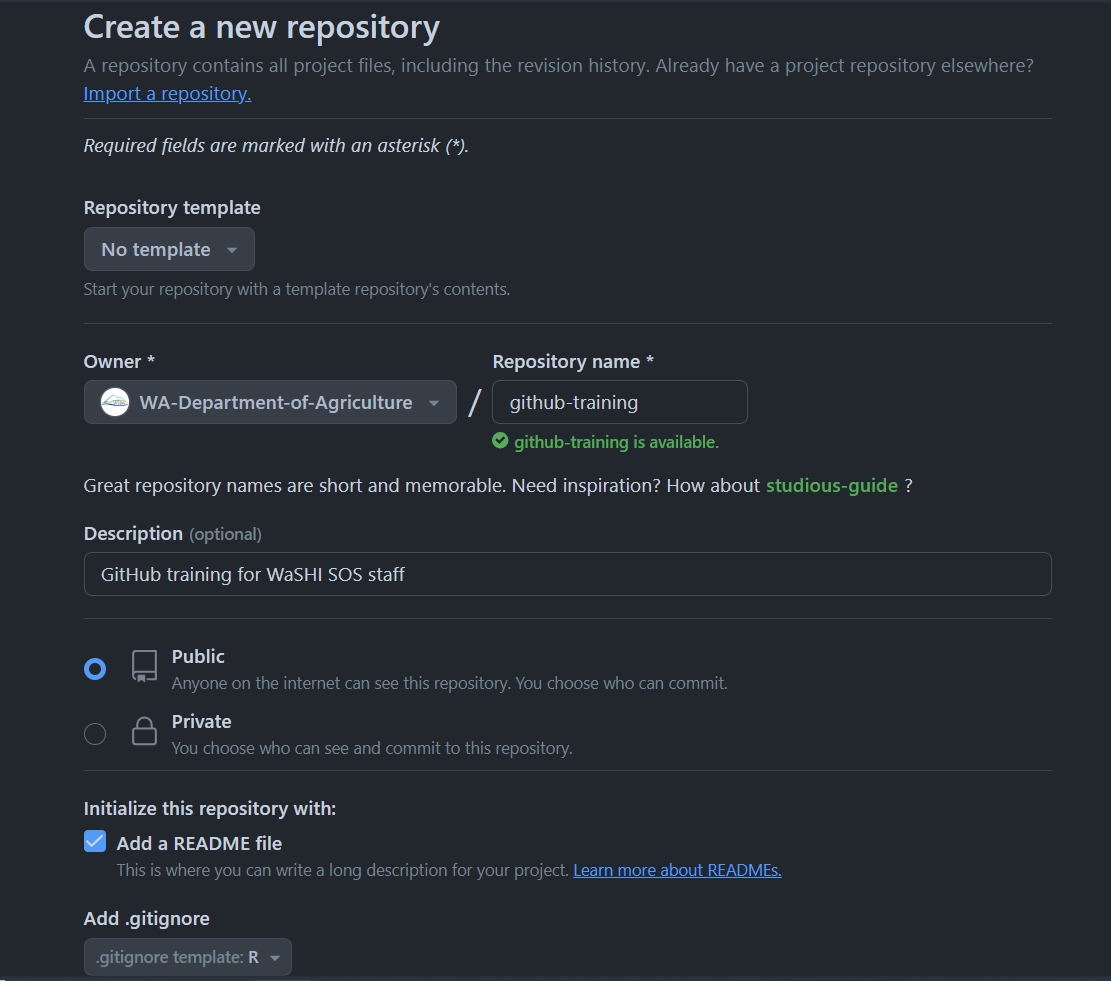
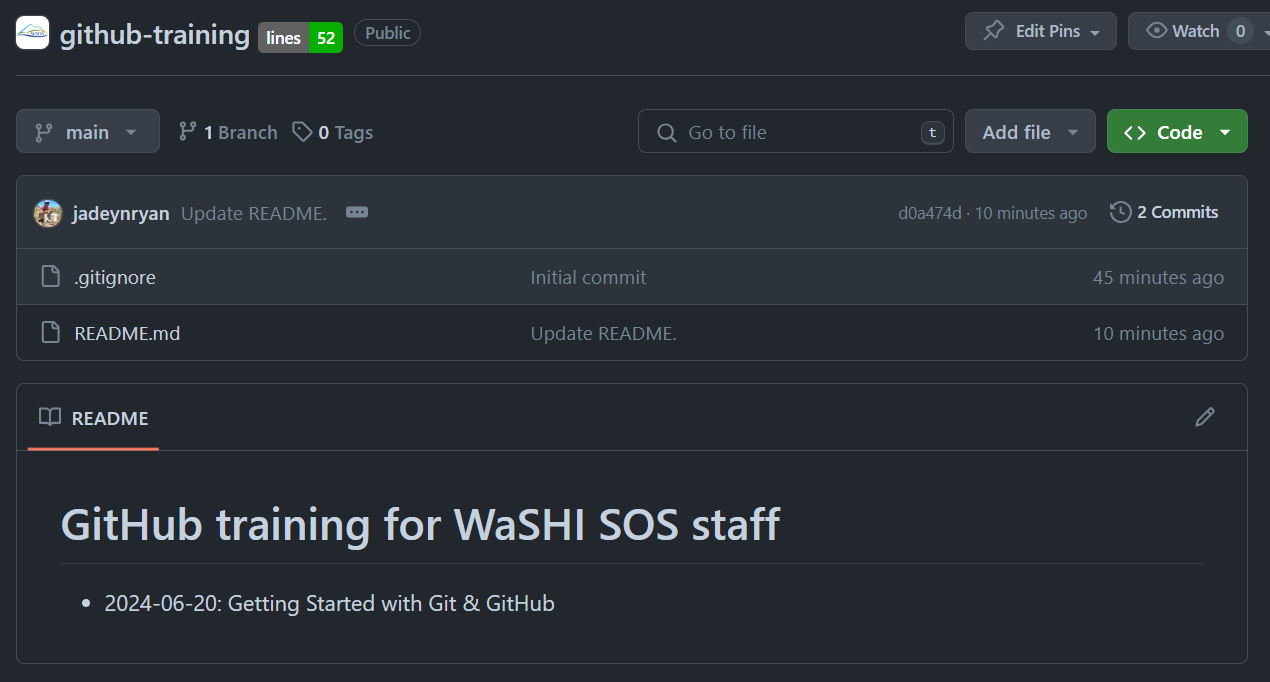
  1. Make a test repo on GitHub. Initialize with “Add a README file”.

Ch 11 & 12: Connect Git, GitHub, RStudio

  1. Copy the HTTPS Clone URL.

Ch 11 & 12: Connect Git, GitHub, RStudio

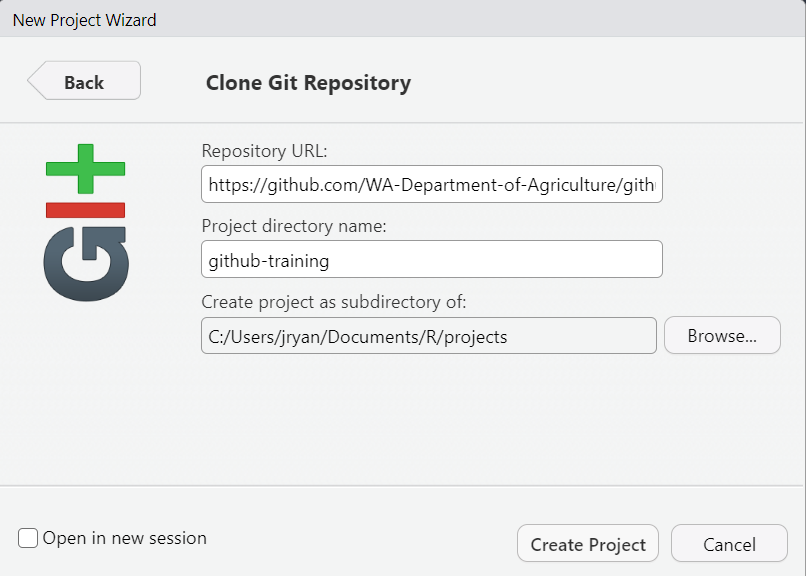
  1. Clone the test repo to your computer:

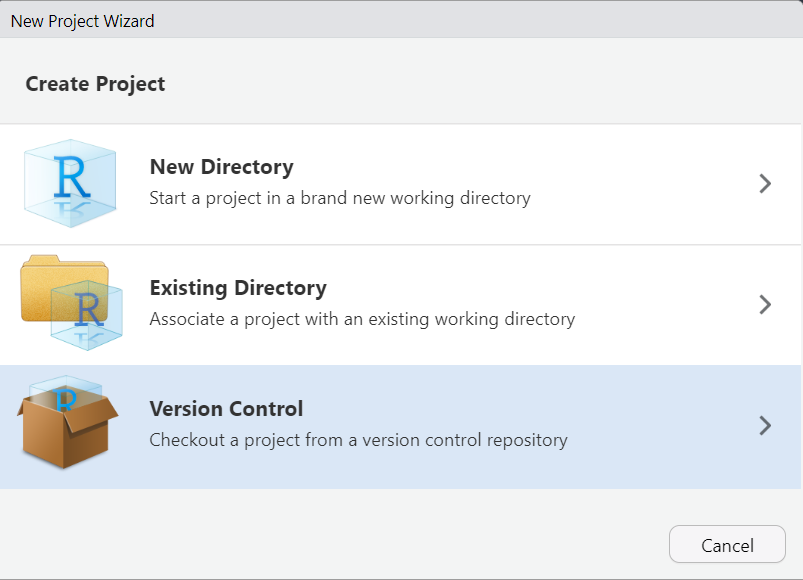
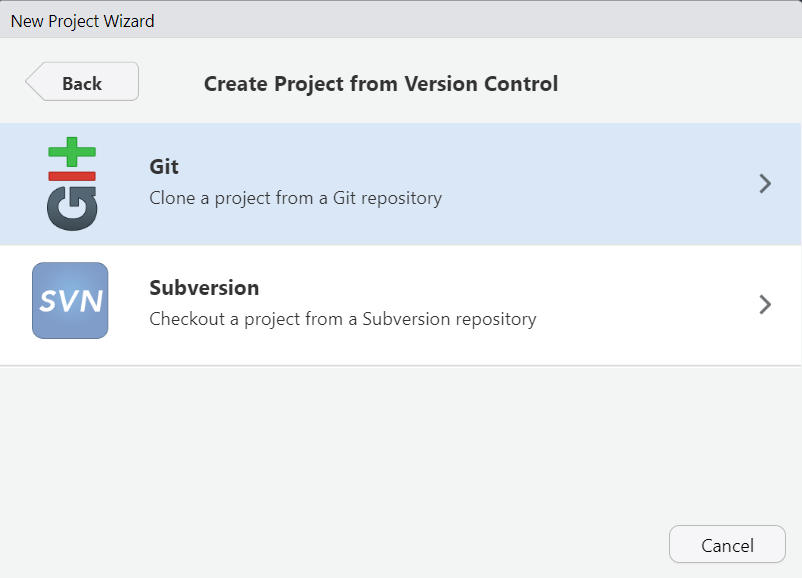
    1. RStudio > File > New Project > Version Control > Git

    2. Paste the URL copied from GitHub into “Repository URL”.

    3. Leave the default project directory name the same as the GitHub repo name.

    4. Intentionally choose where to save this project locally.

    5. Click “Create Project”.

Ch 11 & 12: Connect Git, GitHub, RStudio

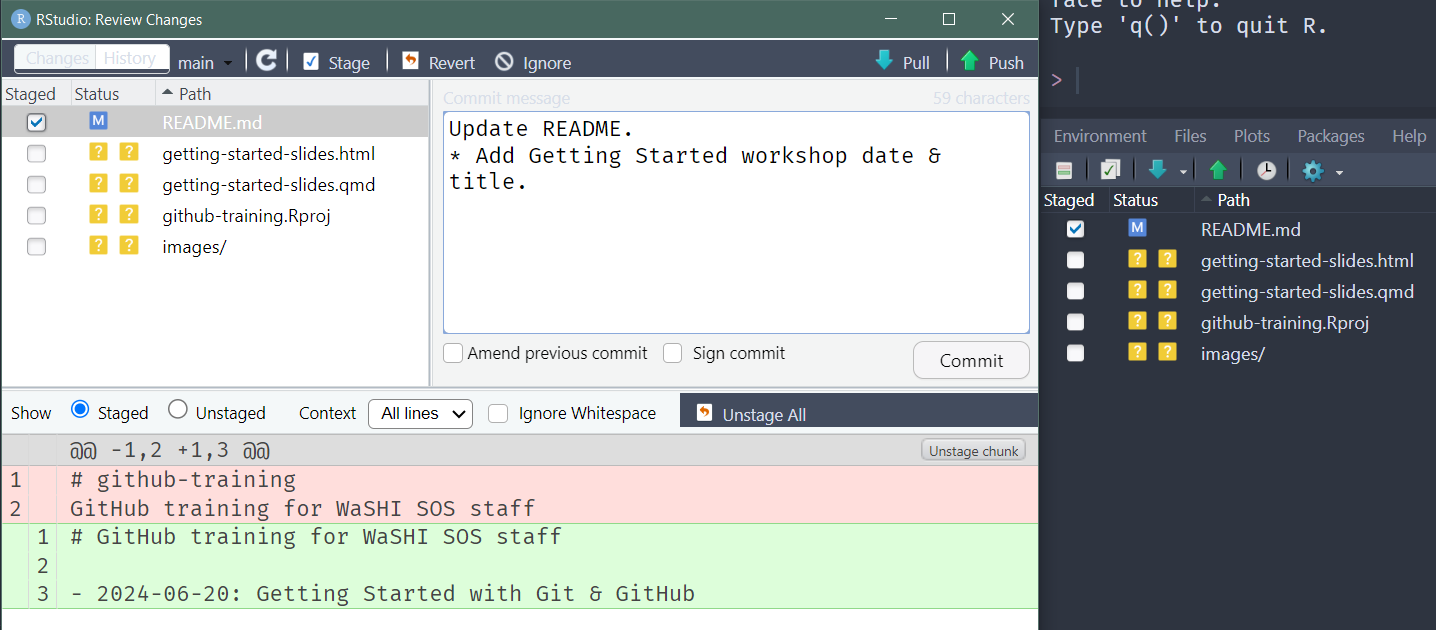
  1. Make local changes, save, commit, and push to GitHub:

    1. Modify the README.md. Save.

    2. Stage the changed file(s).

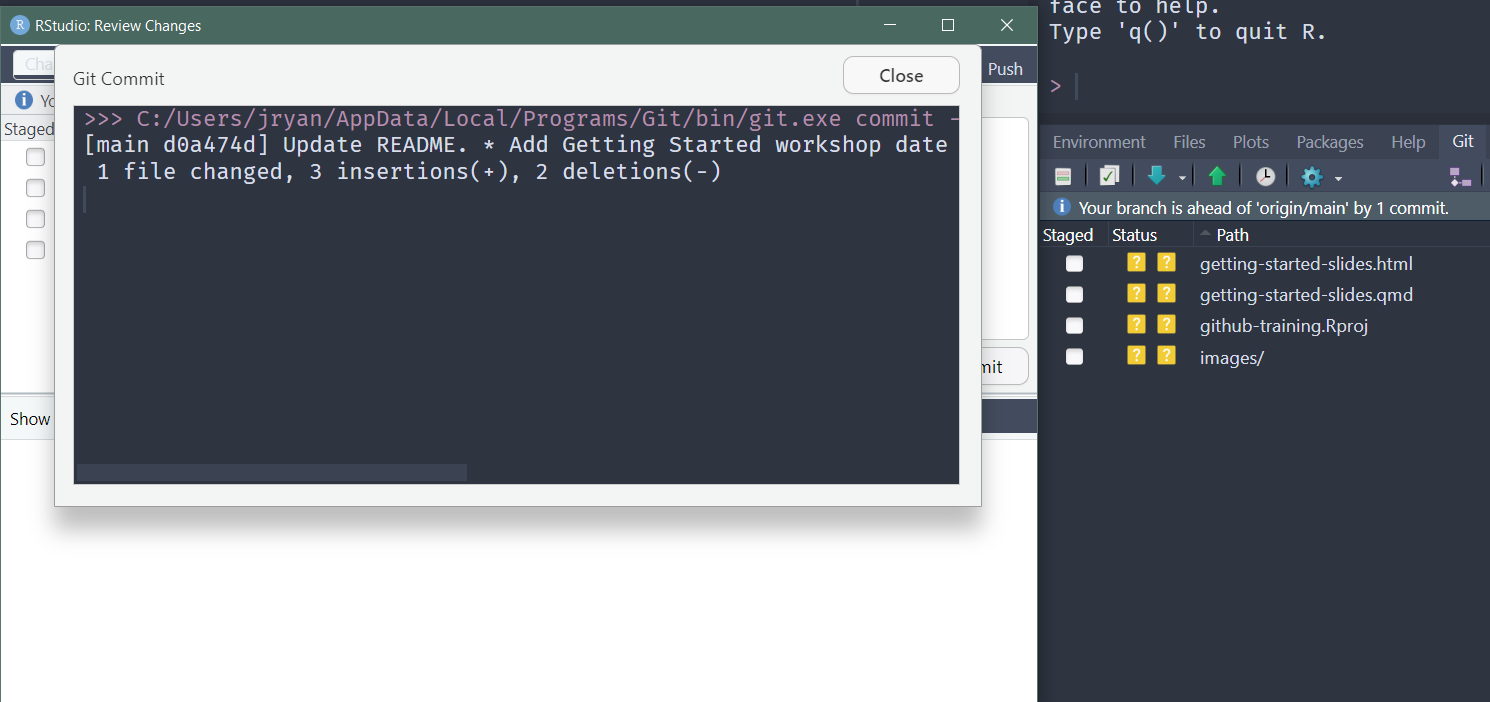
    3. Commit the staged changes (with a good commit message).

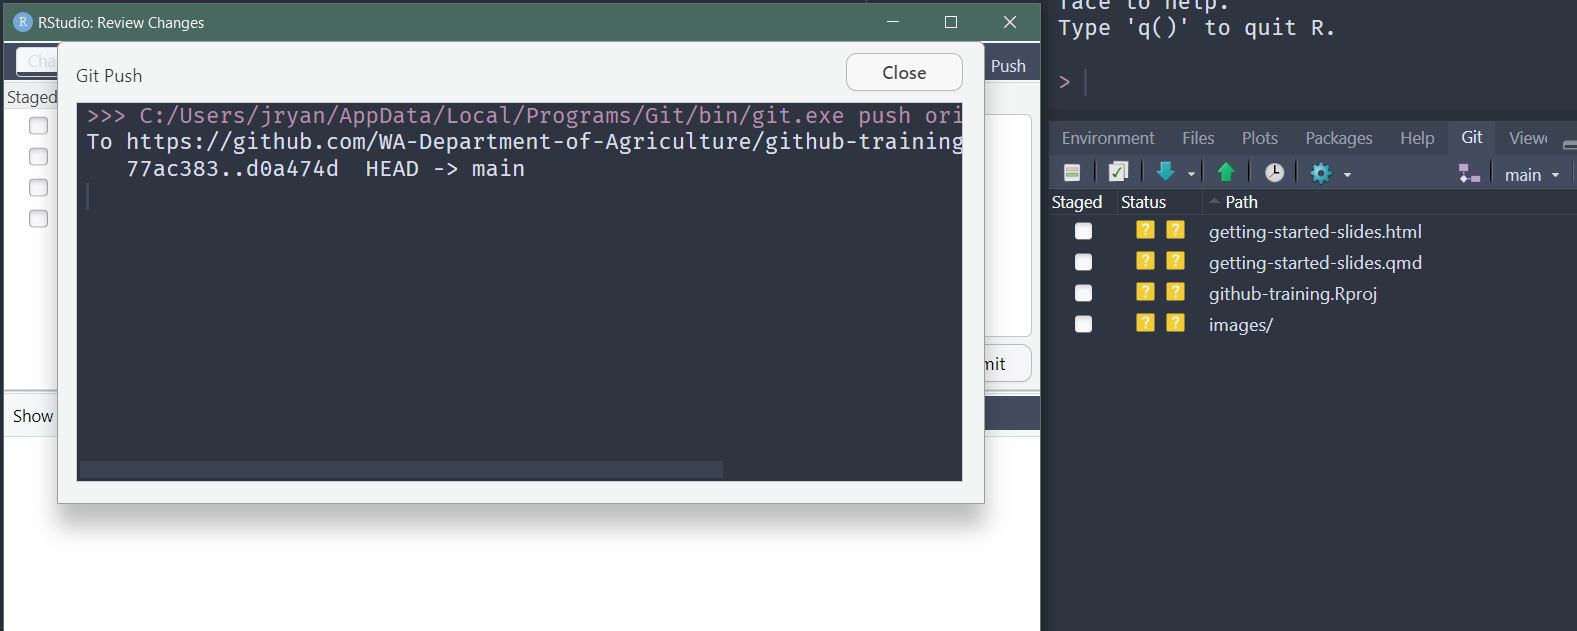
    4. Repeat a-c as much as you’d like, then Push the commit(s).

    5. Check the changes made it to the remote (i.e., repo on GitHub).

Ch 11 & 12: Connect Git, GitHub, RStudio

  1. Clean up:

    • Quit the RStudio project.

    • Delete the project folder.

    • Delete the remote on GitHub. Settings > Danger Zone > Delete this repository > do as it asks.

Problems with Chapters 11 & 12?

Ch 20. Repo, commit, diff

  • repository or repo: set of files in a folder

  • clone: local version of a repo

  • remote: the repo on GitHub

  • stage: prepare a file or files for a commit

  • commit: snapshot of all files in the project

  • diff: differences between commits

  • push: uploads all commits to GitHub

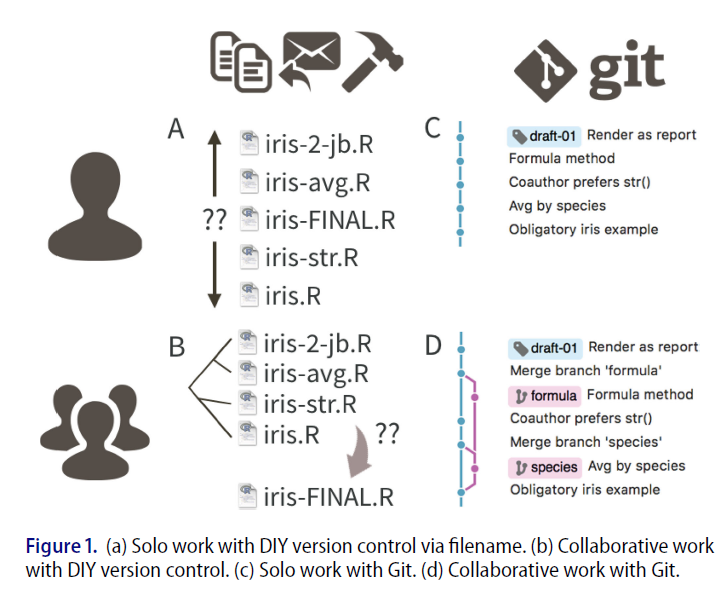
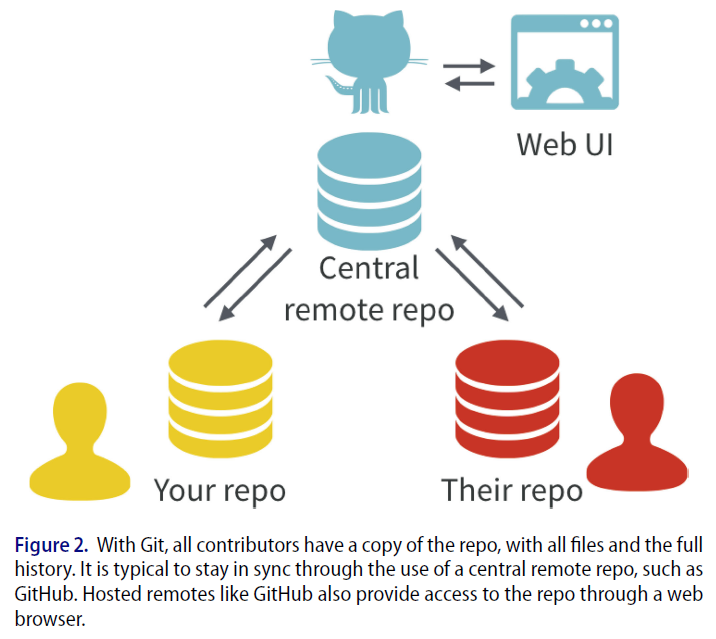
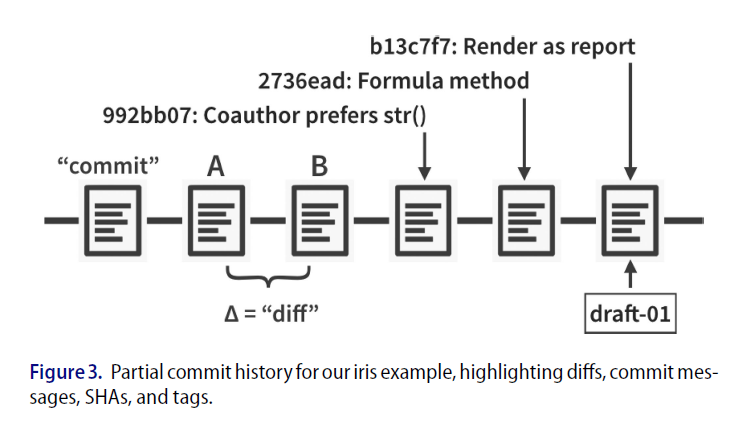
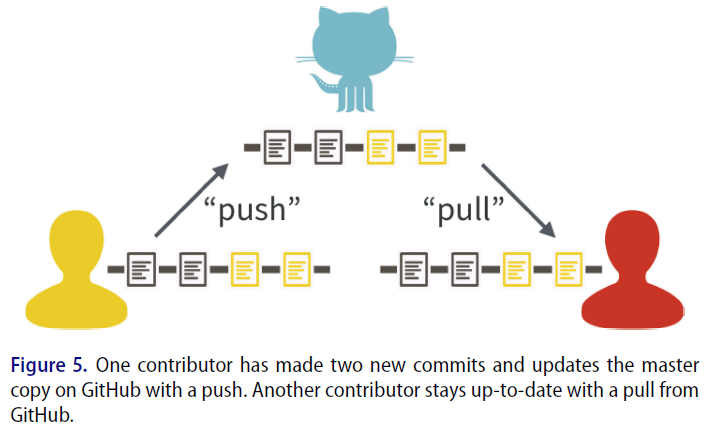
Excuse Me, Do You Have a Moment to Talk About Version Control?

Figures from (Bryan 2018)

Workflow for WaSHI SOS repo

https://github.com/WA-Department-of-Agriculture/washi-sos

Clone washi-sos to your computer (step 3 of Ch 11 & 12) using this repo URL:

https://github.com/WA-Department-of-Agriculture/washi-sos.git

Click the Pull button in the Git pane of RStudio to copy changes from the remote repo on GitHub to your local repo.

More resources

For educational fun:

Discussion

  • Questions from the group?
  • Integrating Luis’ work on the management data

    • Option 1: Luis works in a separate repo with a “final” dataset folder that I manually or automatically pull in to the master washi-sos repo? WSDA or WaSHI organization?

    • Option 2: Luis works in washi-sos with push/pull access. Careful to communicate and avoid merge conflicts.

  • GitHub vs Sharepoint vs Shared Drives: too many copies to maintain

  • More GitHub trainings?